Gas firing
As it was my first time ever firing up a gas kiln (along side with my pal Dimi of Sway Ceramics, and our studio manager Clare Spindler) I thought I’d share my newbie experience here. Hopefully my lesson learned would be useful for those who wants to try out reduction firing at some point! It’s actually not as hard as you may think but preparation is key and patience!
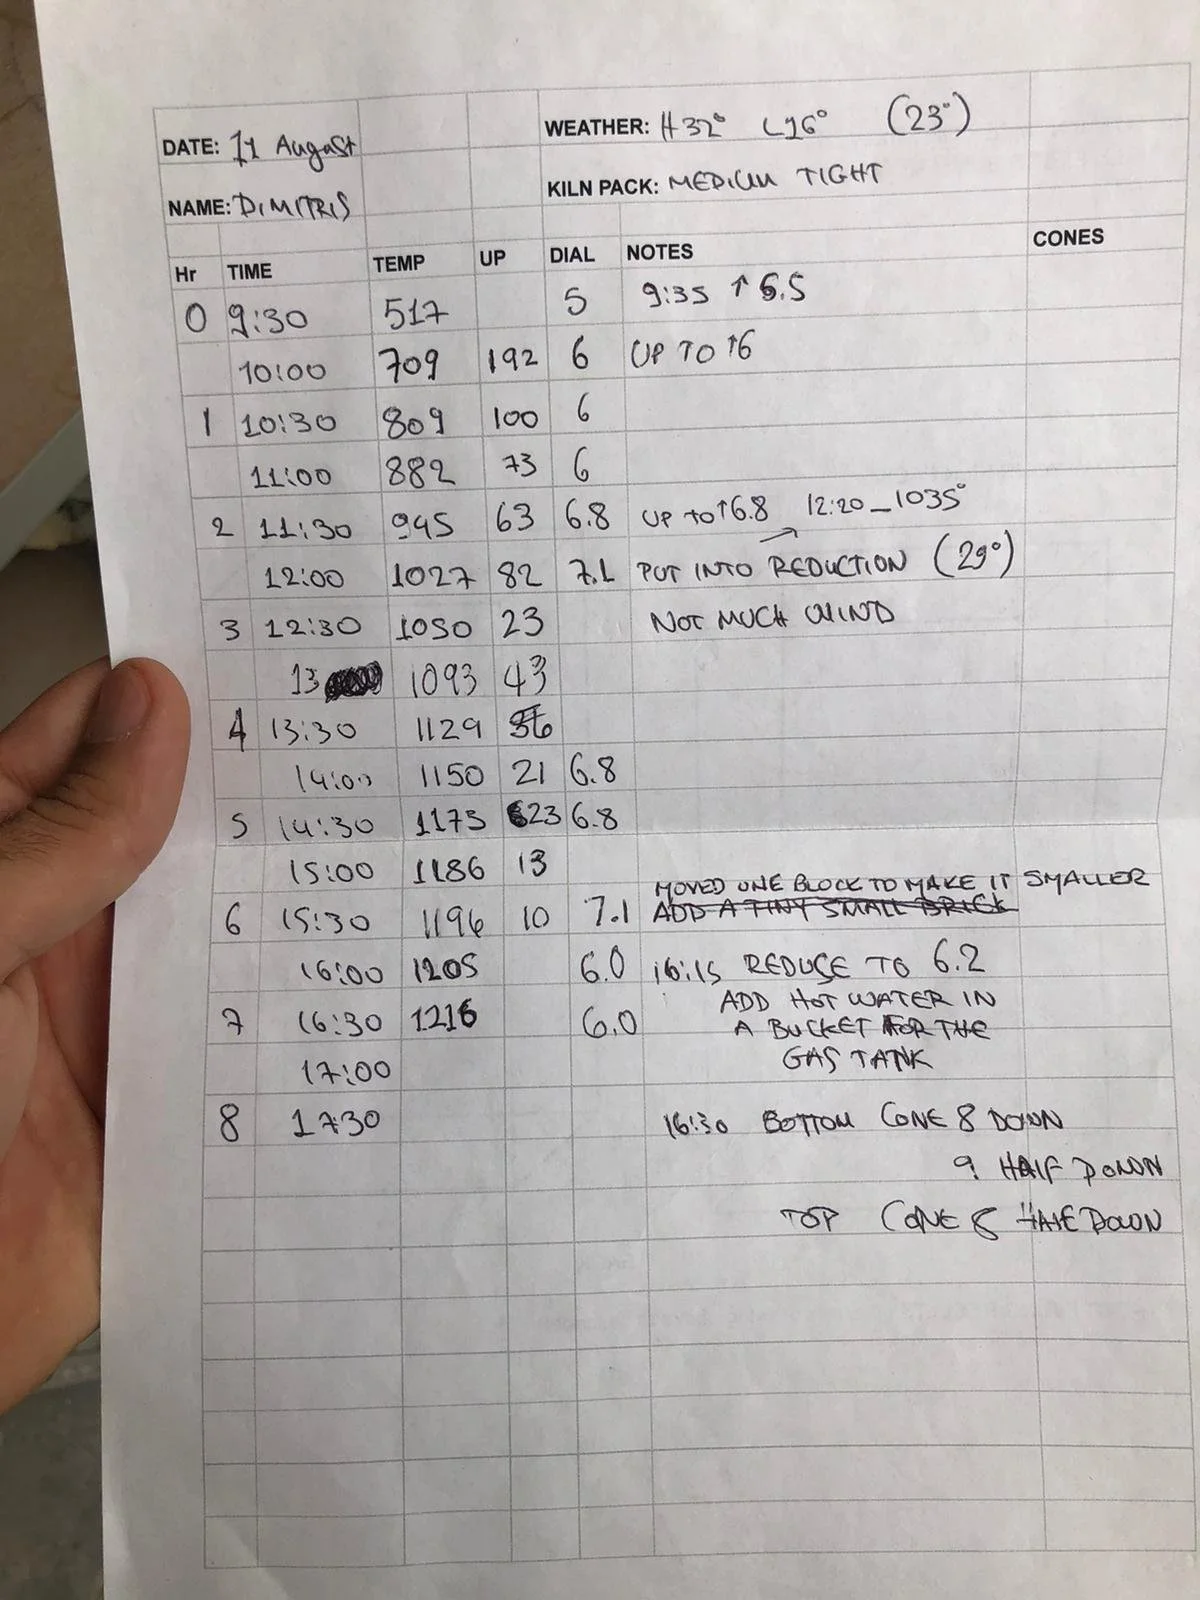
Preparation - We allowed 3 days in total to load the kiln, do the firing itself (roughly 8 hours) and the last day for unloading. (and of course we bloody picked the hottest day in London for firing! (31 deg))
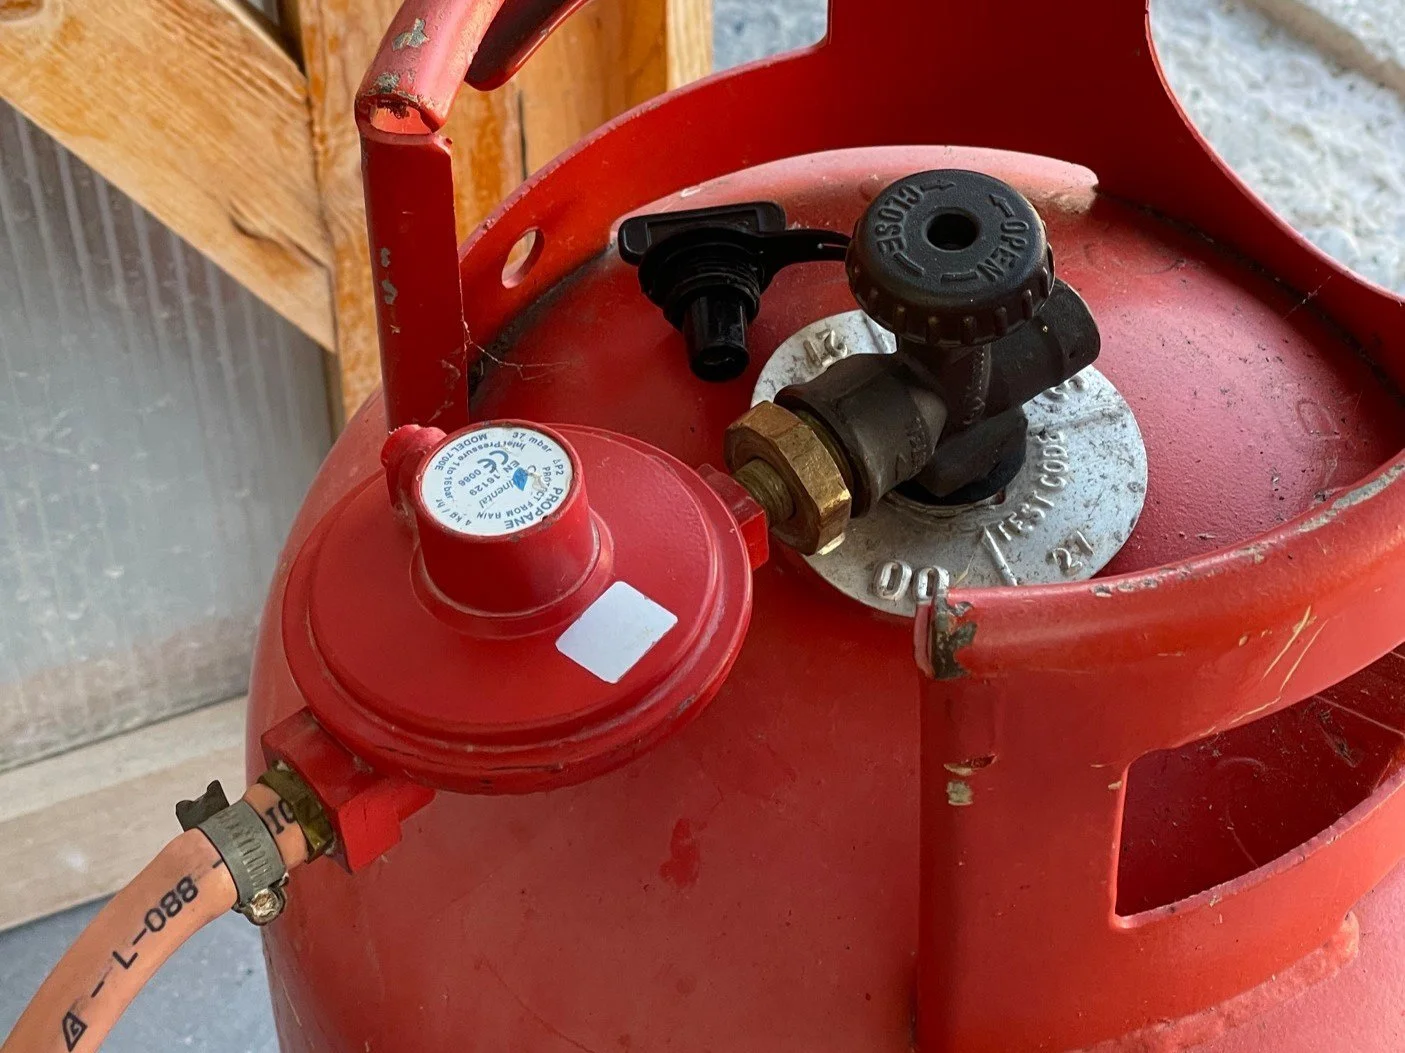
Mechanics of gas kiln - Ours one was the downdraft type with two air vent holes, the fire enters from below - rises above to top of the kiln and down again to exit through the vent holes. We put the kiln into reduction by blocking out the vent holes with bricks. Pressure gauge and a pyro is connected to the kiln to record temperature.
So what is reduction? Chemically reduction describes the process of electrons gain. Atmospherically you’re basically choking air (oxygen) out of this chamber to get sexy results :)
In oxidation, complete combustion (clean burn with blue flame) takes place - Fuel + O2 → CO2 + H2O
Reduction is incomplete combustion of our propane that yields carbon monoxide - 2 C3H8 + 9 O2 → 4 CO2 + 2 CO + 8 H2O + Heat
As oxygen is starved in our kiln the CO searches for oxides in clay bodies and in glazes producing interesting results. “These process result in the metals in your glaze gaining electrons which means the net charge or oxidation state is reduced.” (ceramicsartnetwork.org)
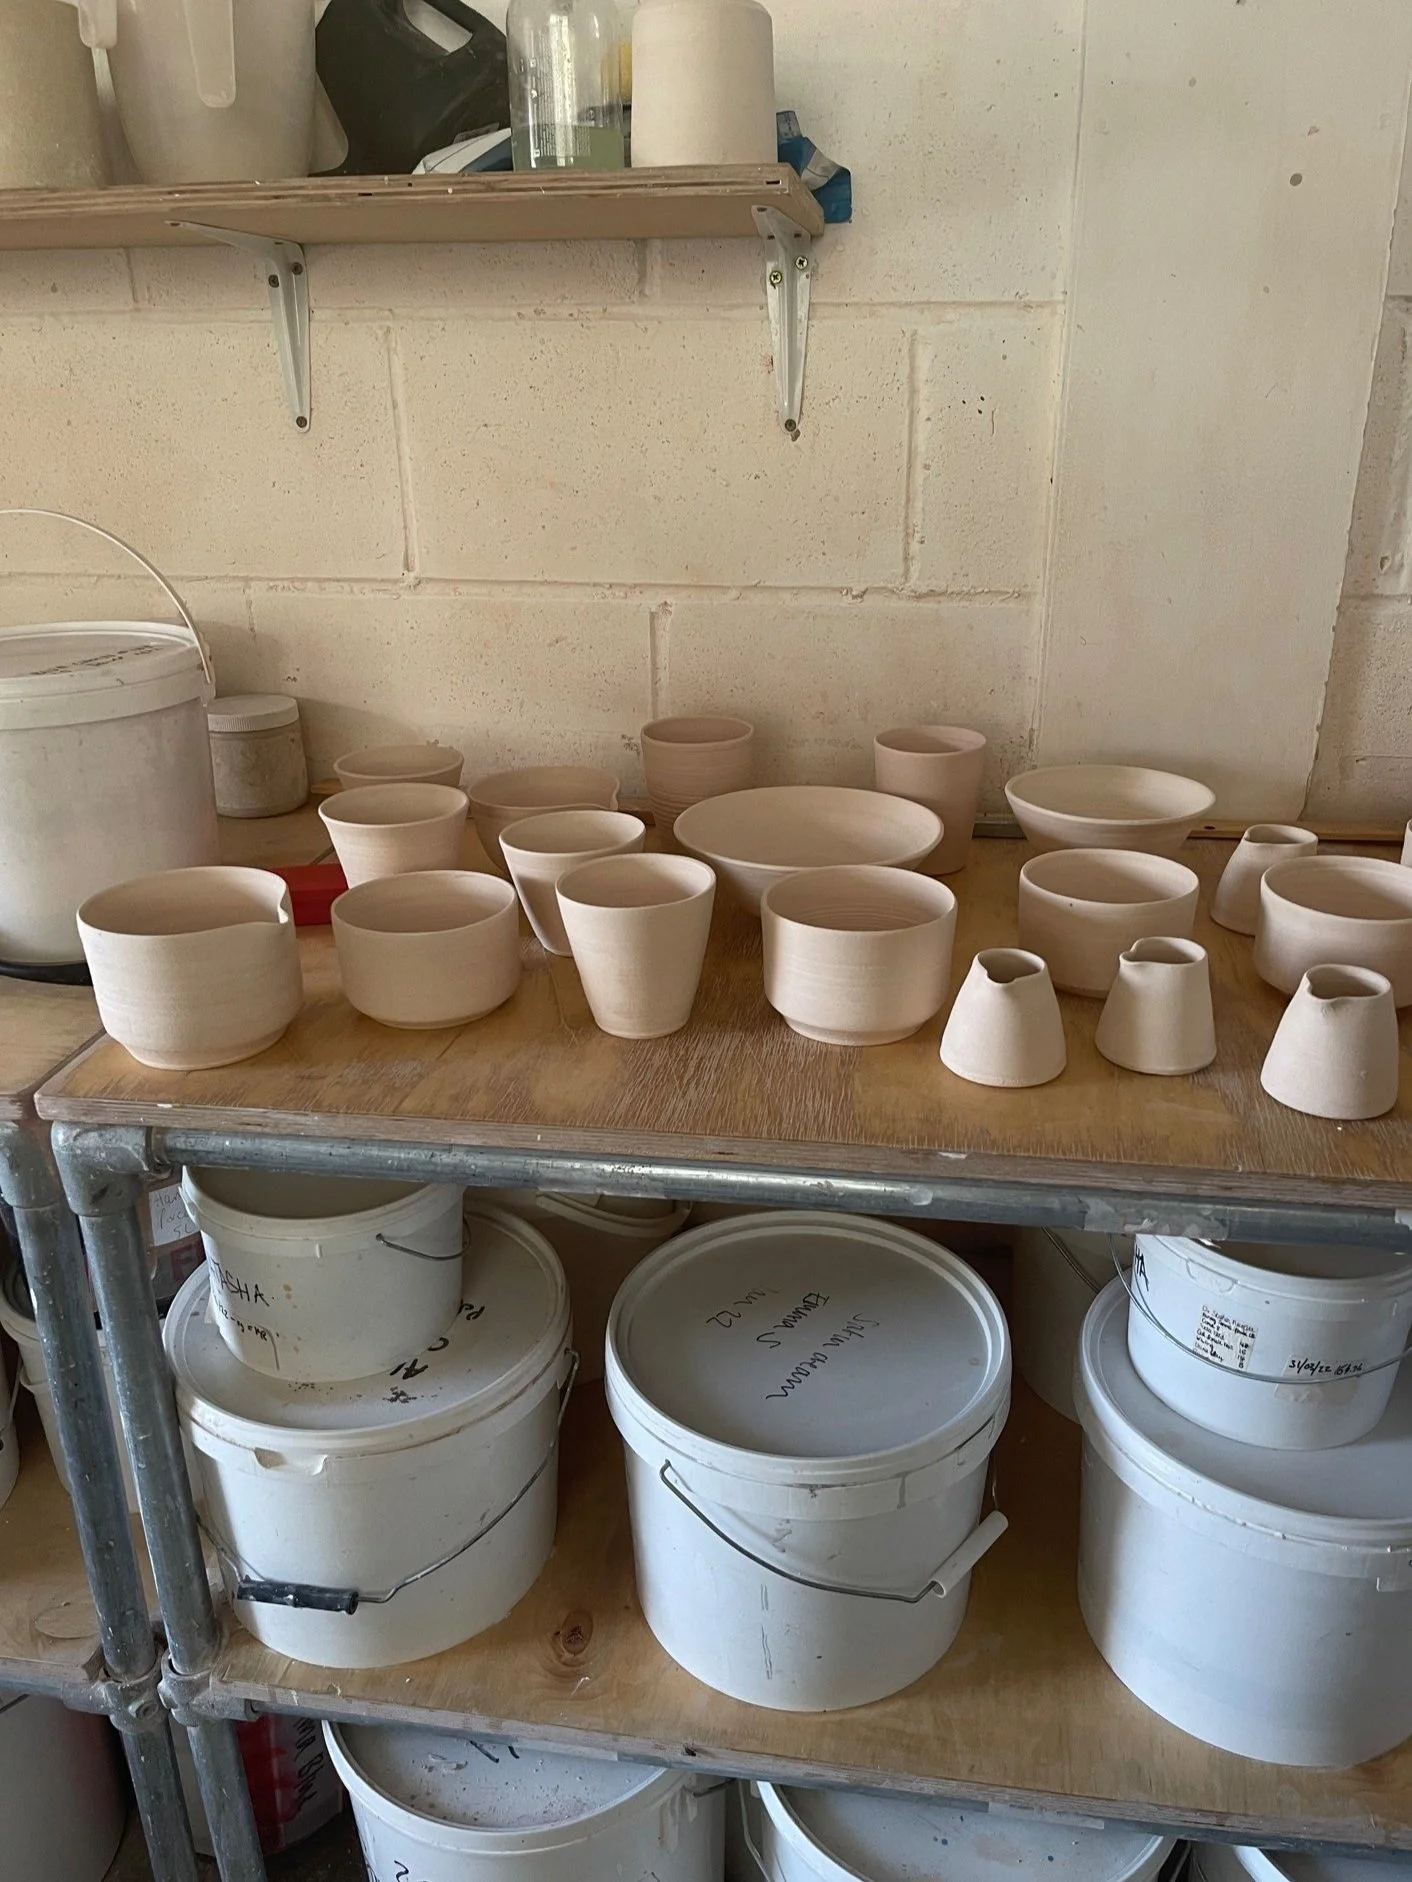
Clay body - Before I start talking about kiln loading, from this experience I think it’s quite important that you study the clay bodies you want to use and anticipate how it could look in reduction. I’ll admit I was a bit disappointed with the clay body I used :( (premium sanded body) this is NOT the same as Sanded buff clay meh but now I’ve learned! Vulcan (black clay) apparently doesn’t work too well in high reduction atmosphere and from what I heard the results tend to turn out more metallic?? By all means please do your research as you’ll never know how things will turn out when you mix your clay... Our studio manager Clare had some wild clay bits she wanted to test out it didn’t get fired this time but maybe next one!
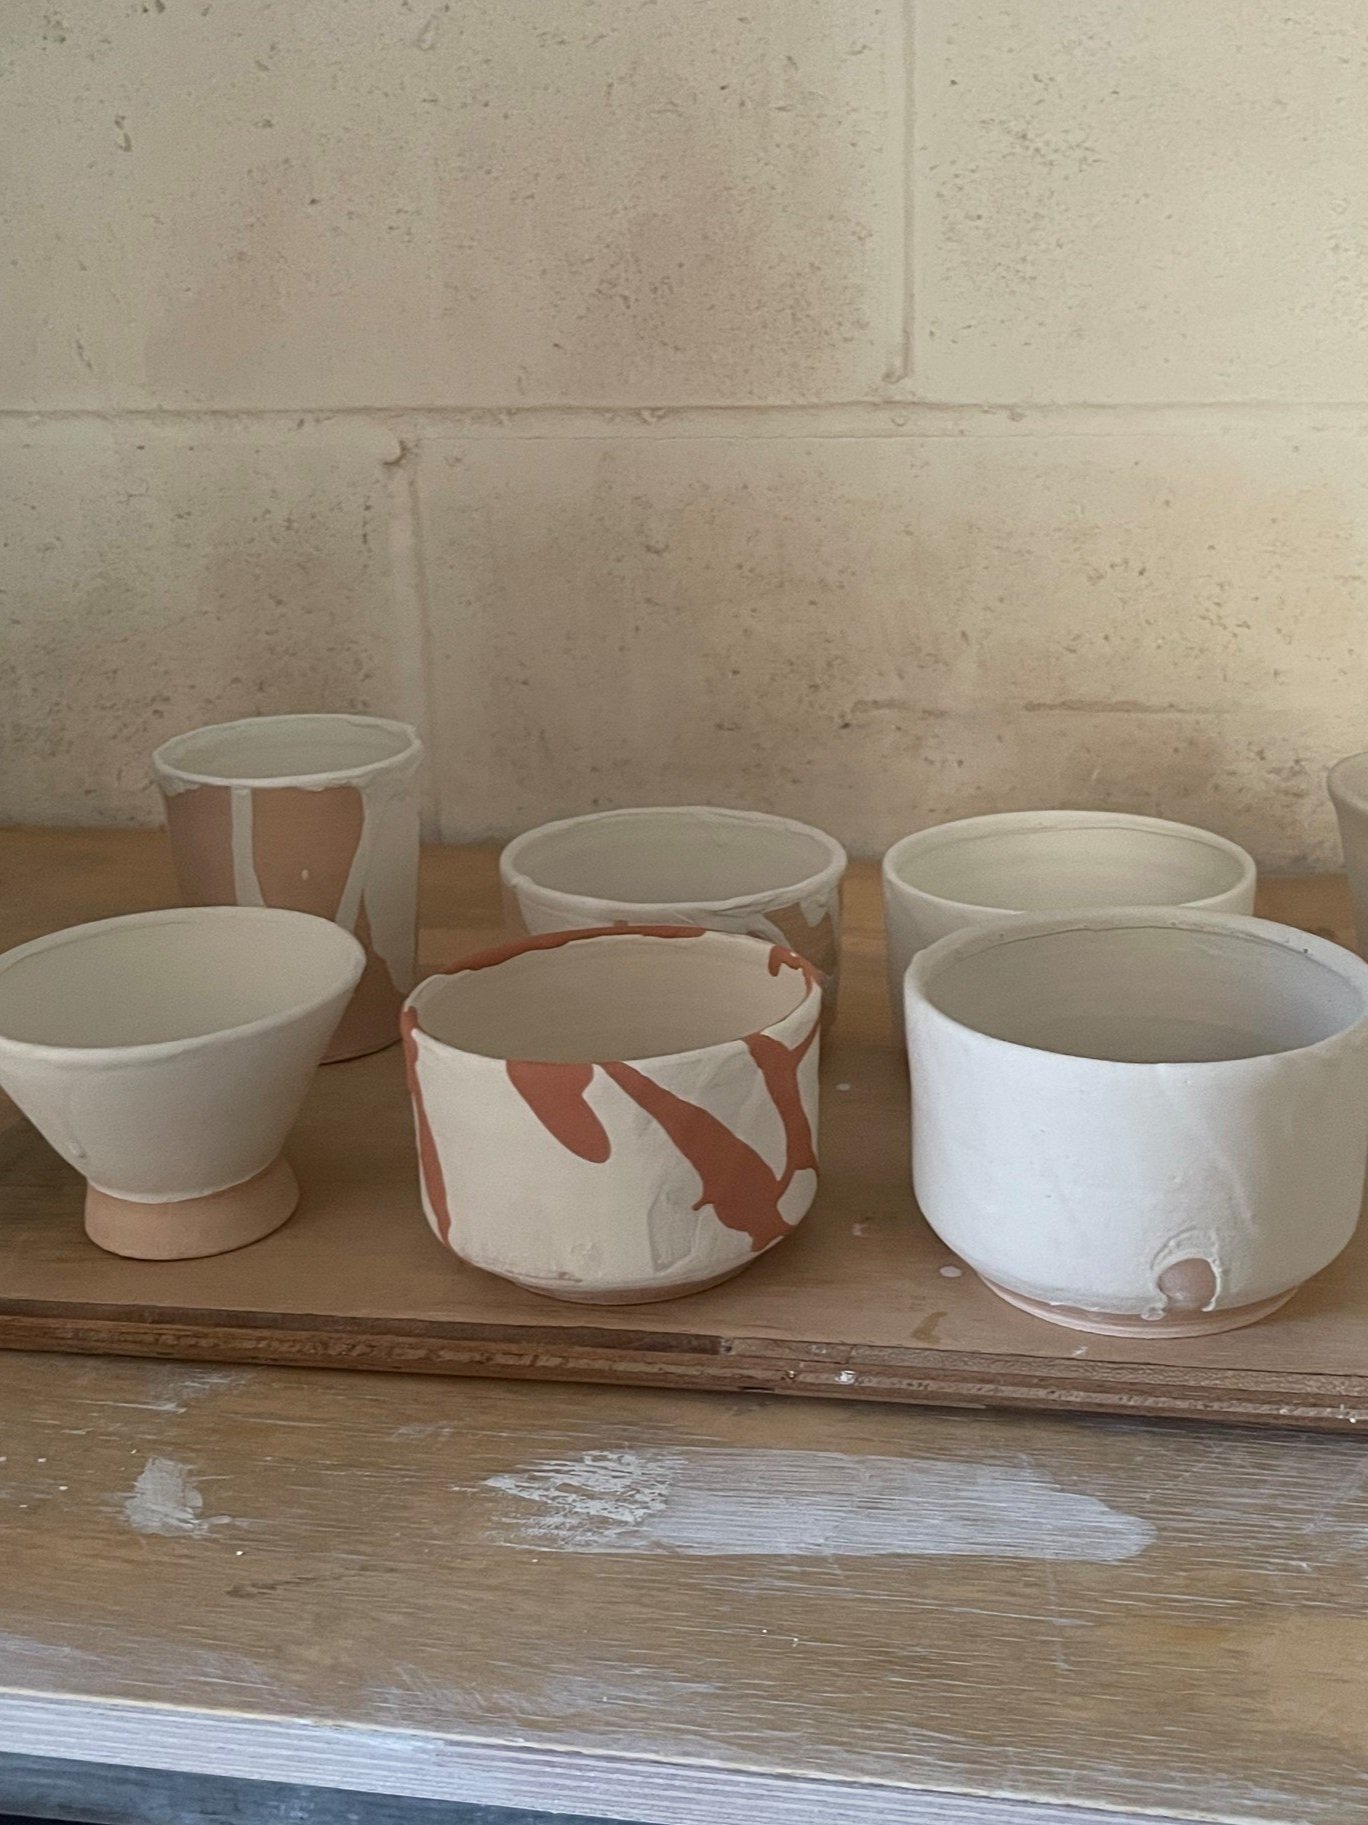
Glaze - Really take your time out to think about what glaze you want to use for the gas firing. I had about 20+ pieces to fire and I wanted to test out 4 different glazes so there was roughly 5 pieces for each glaze. Glaze has to be completely dry before they go in. I was quite spaced out that day while glazing and not in my usual relaxed self I wasn’t sure how they would turn out. I recalled instead of smoothing out the glaze bumpy bits I was playing with studio neighbour’s cat.. -____-

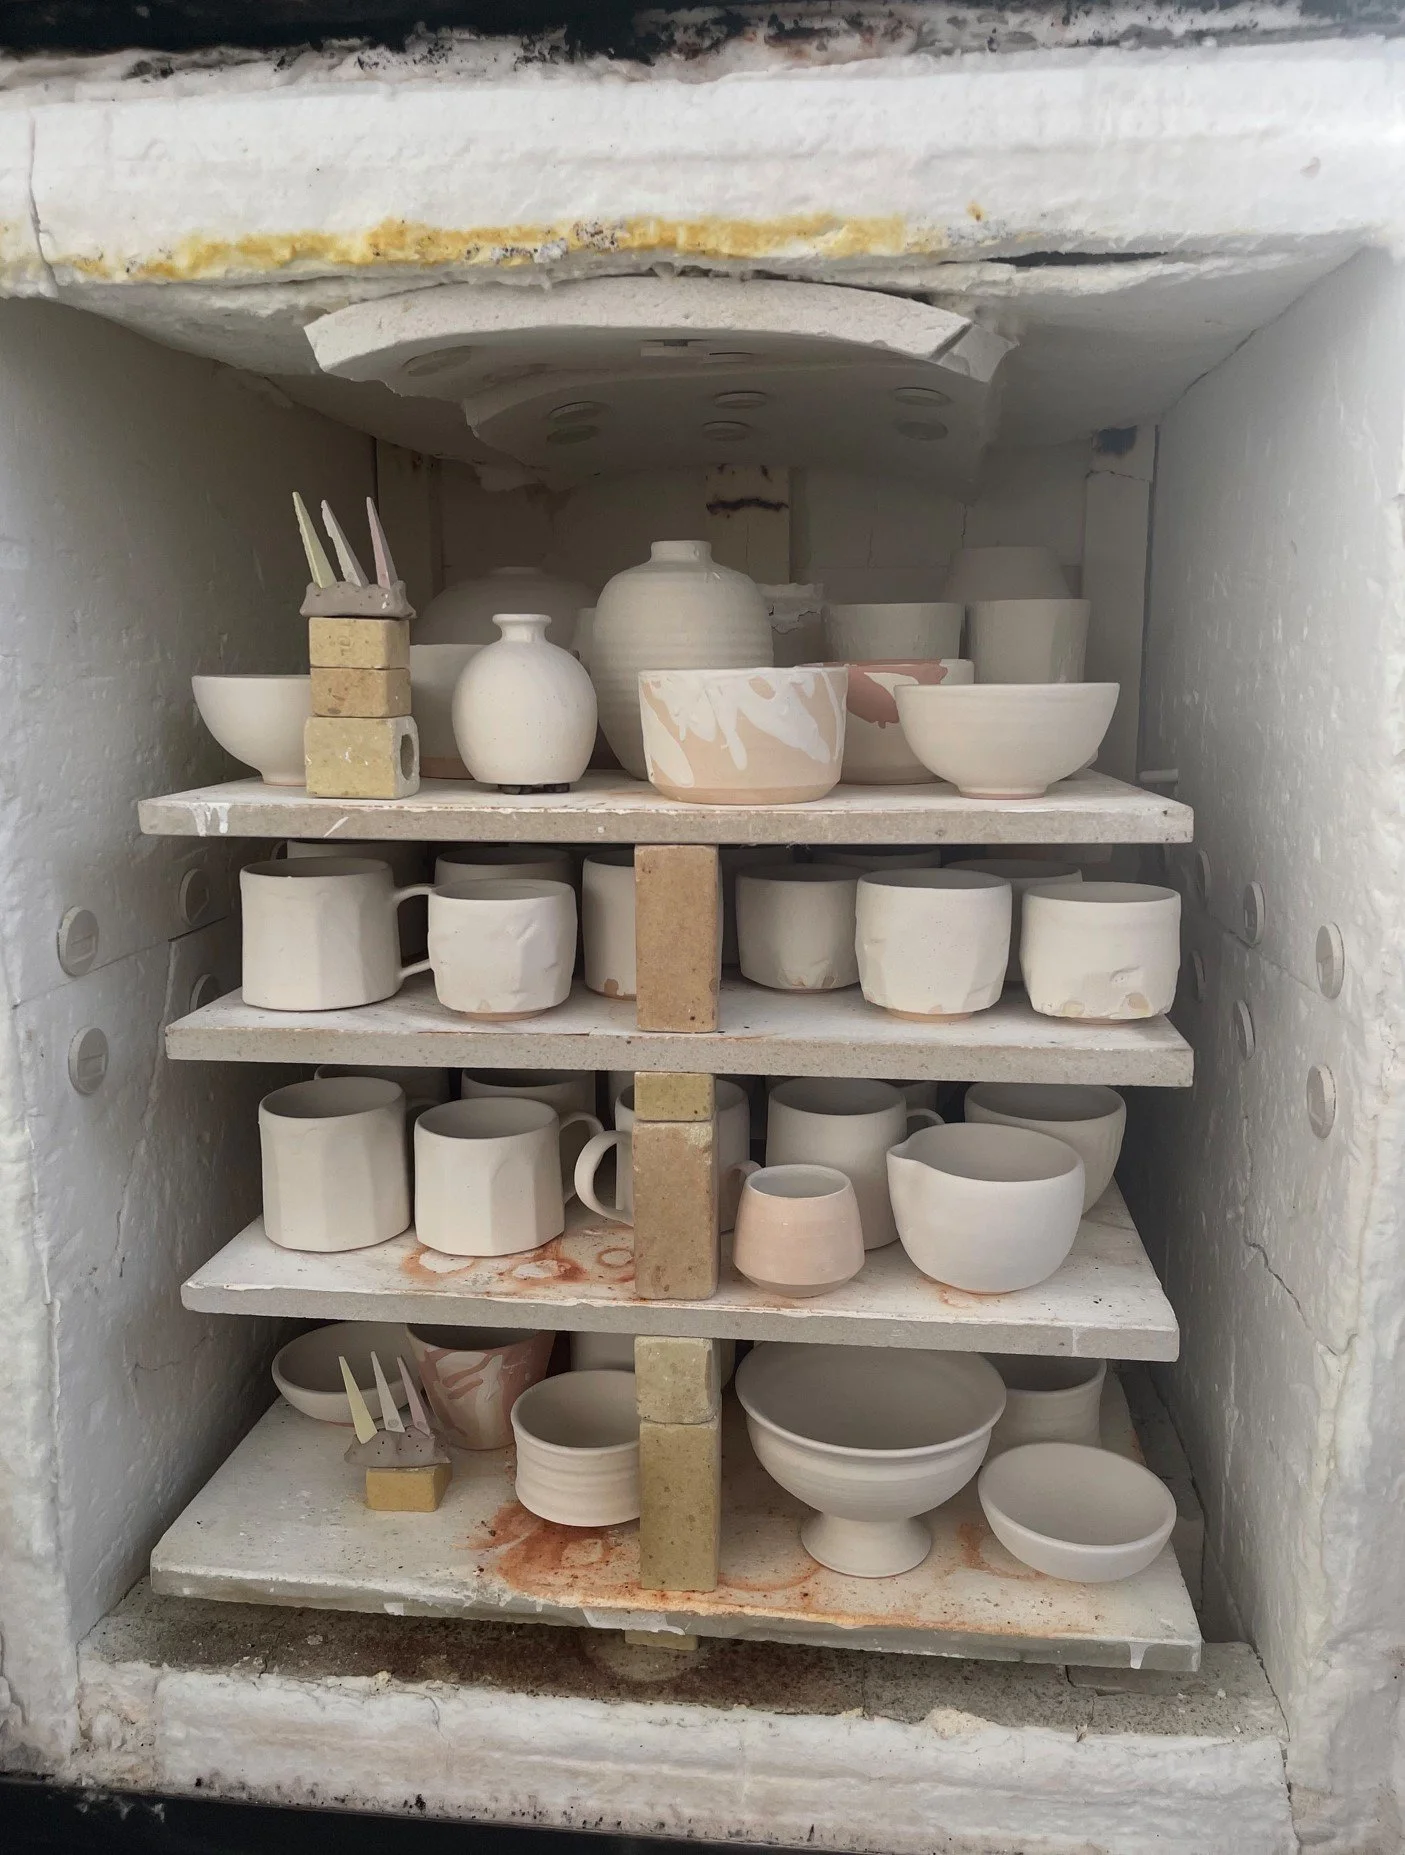
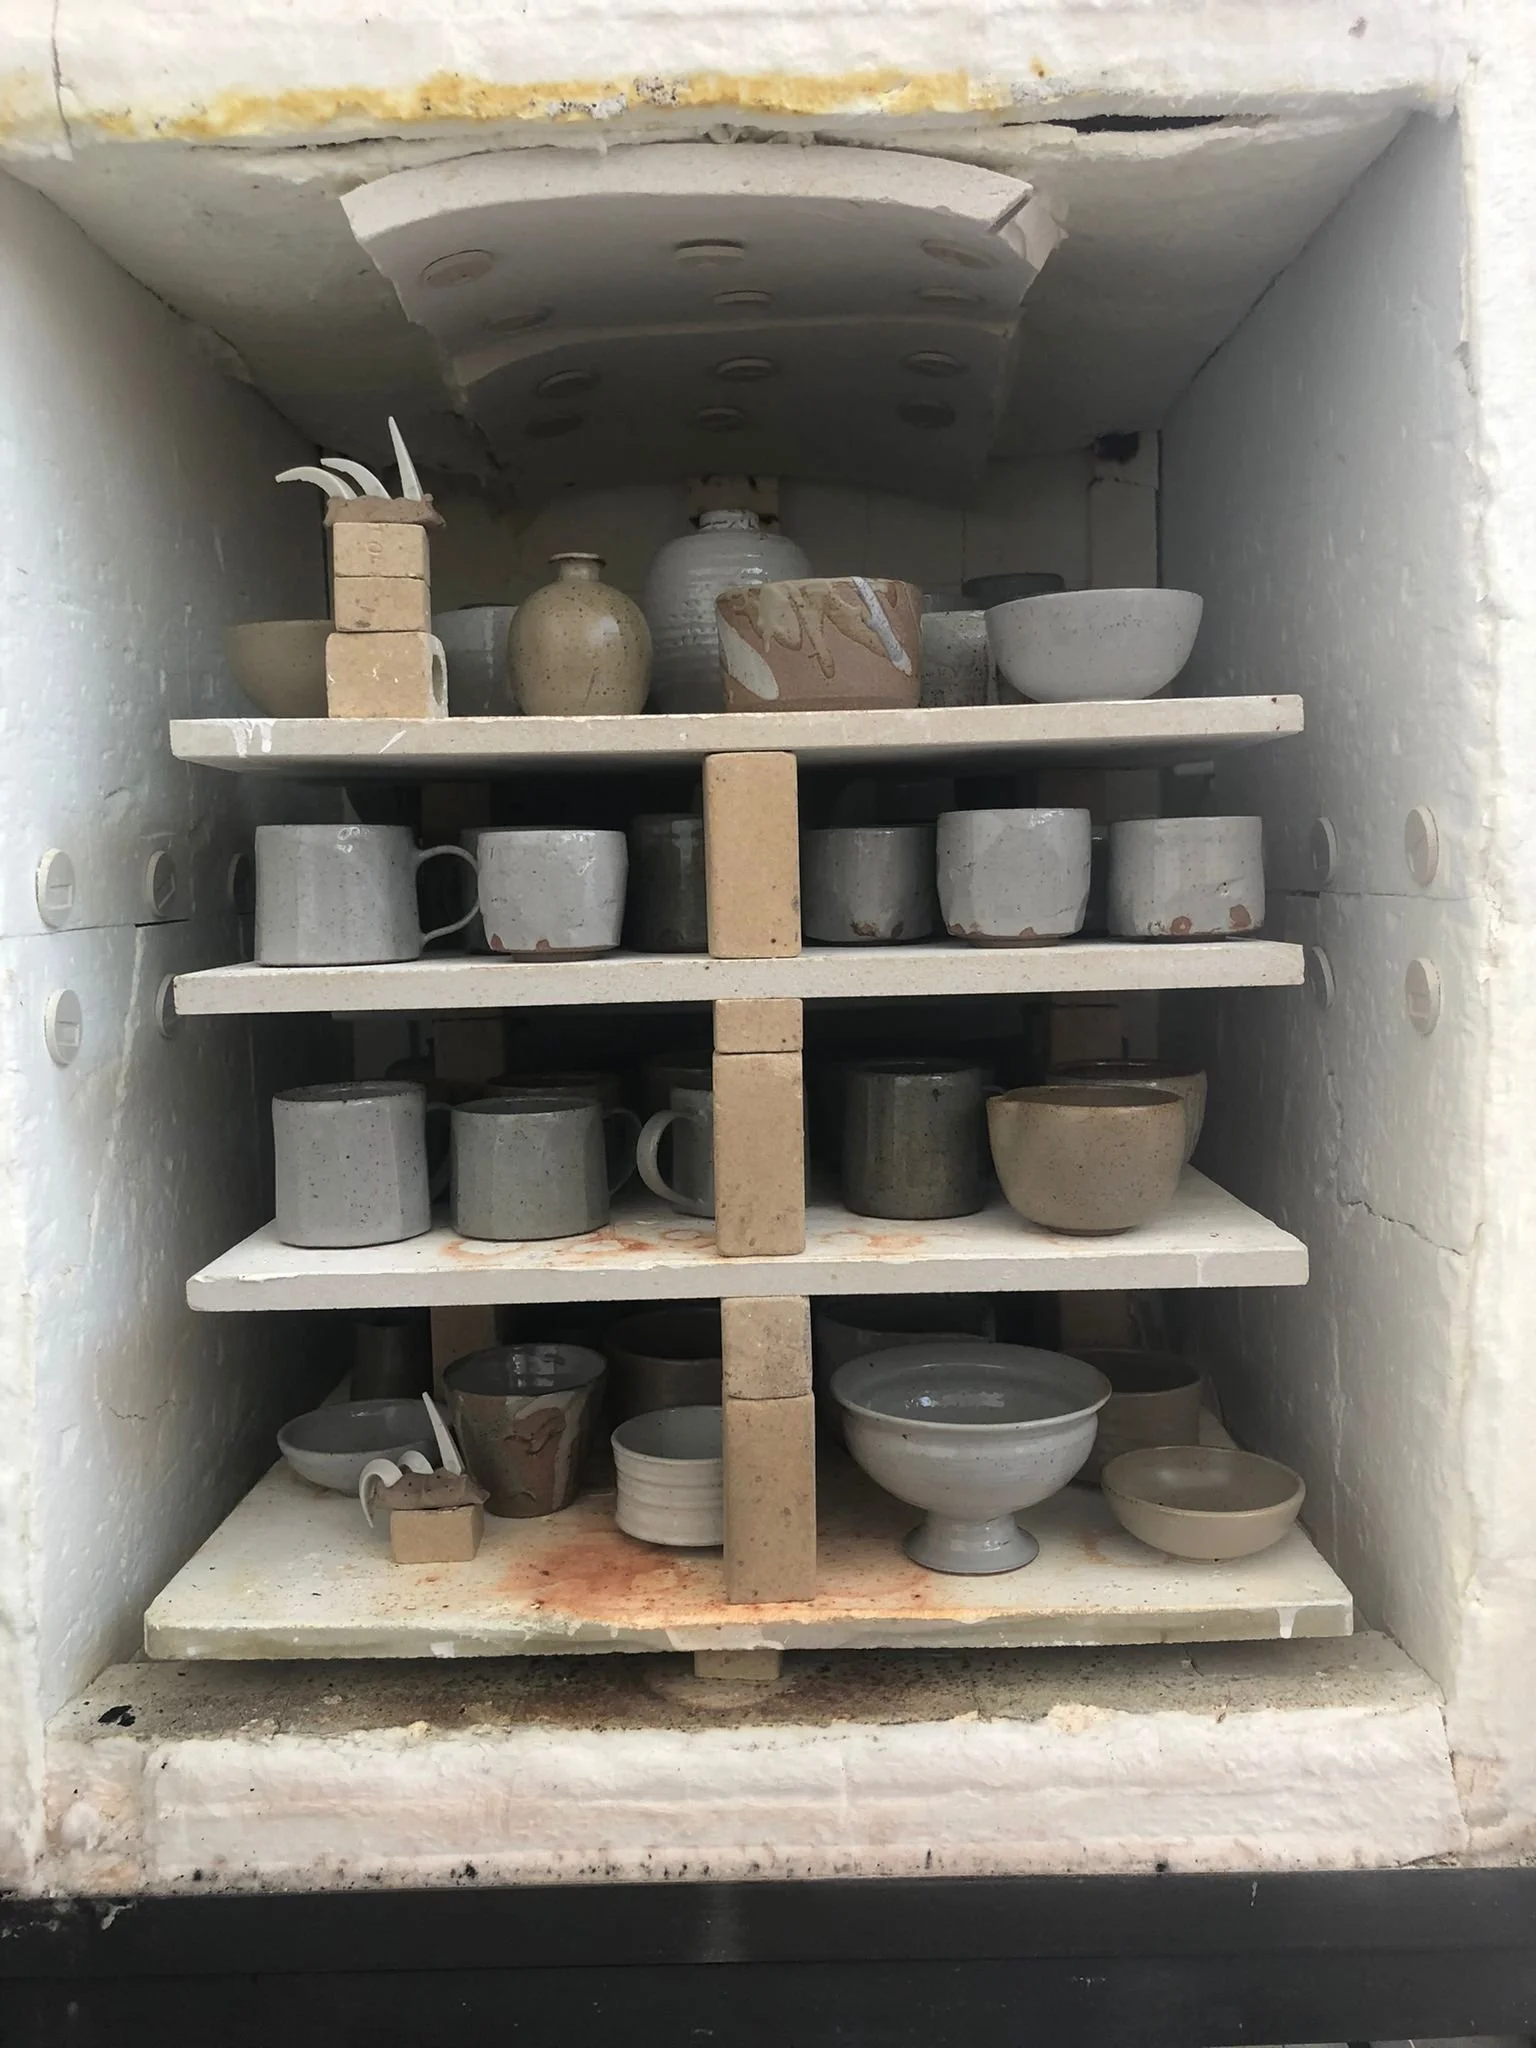
Kiln loading / positioning of pots - This is the juicy bit. I would say this is probably one of the most important steps and I will try to explain why with the help of a diagram.
Our kiln pack was moderately tight, we had a combination of small pieces (cups ,milk jugs, espresso cups), medium sized (bowls) and tall ones (vases).
Pots positioned on lowest shelves also the hottest part will be more oxidised than the higher ones. Pots placed on the edge where the flames are shooting up got more oxidised. Top shelf/middle is the prime spot for reduction
Cone pack - standard cone pack positioned in visible range through the peep holes for cones 08,09,10
Firing day - I rocked up at the studio around half 8 in the morning (the earlier you start the better as it’s going to take the whole day). It was hot that day and we had little wind.
We had ordered our propane tank to be delivered a few days in advance. Make sure you have a full tank when you start the firing. The gas tank in winter would frost up so make sure there is a warm water bucket to soak the tank in to prevent this.
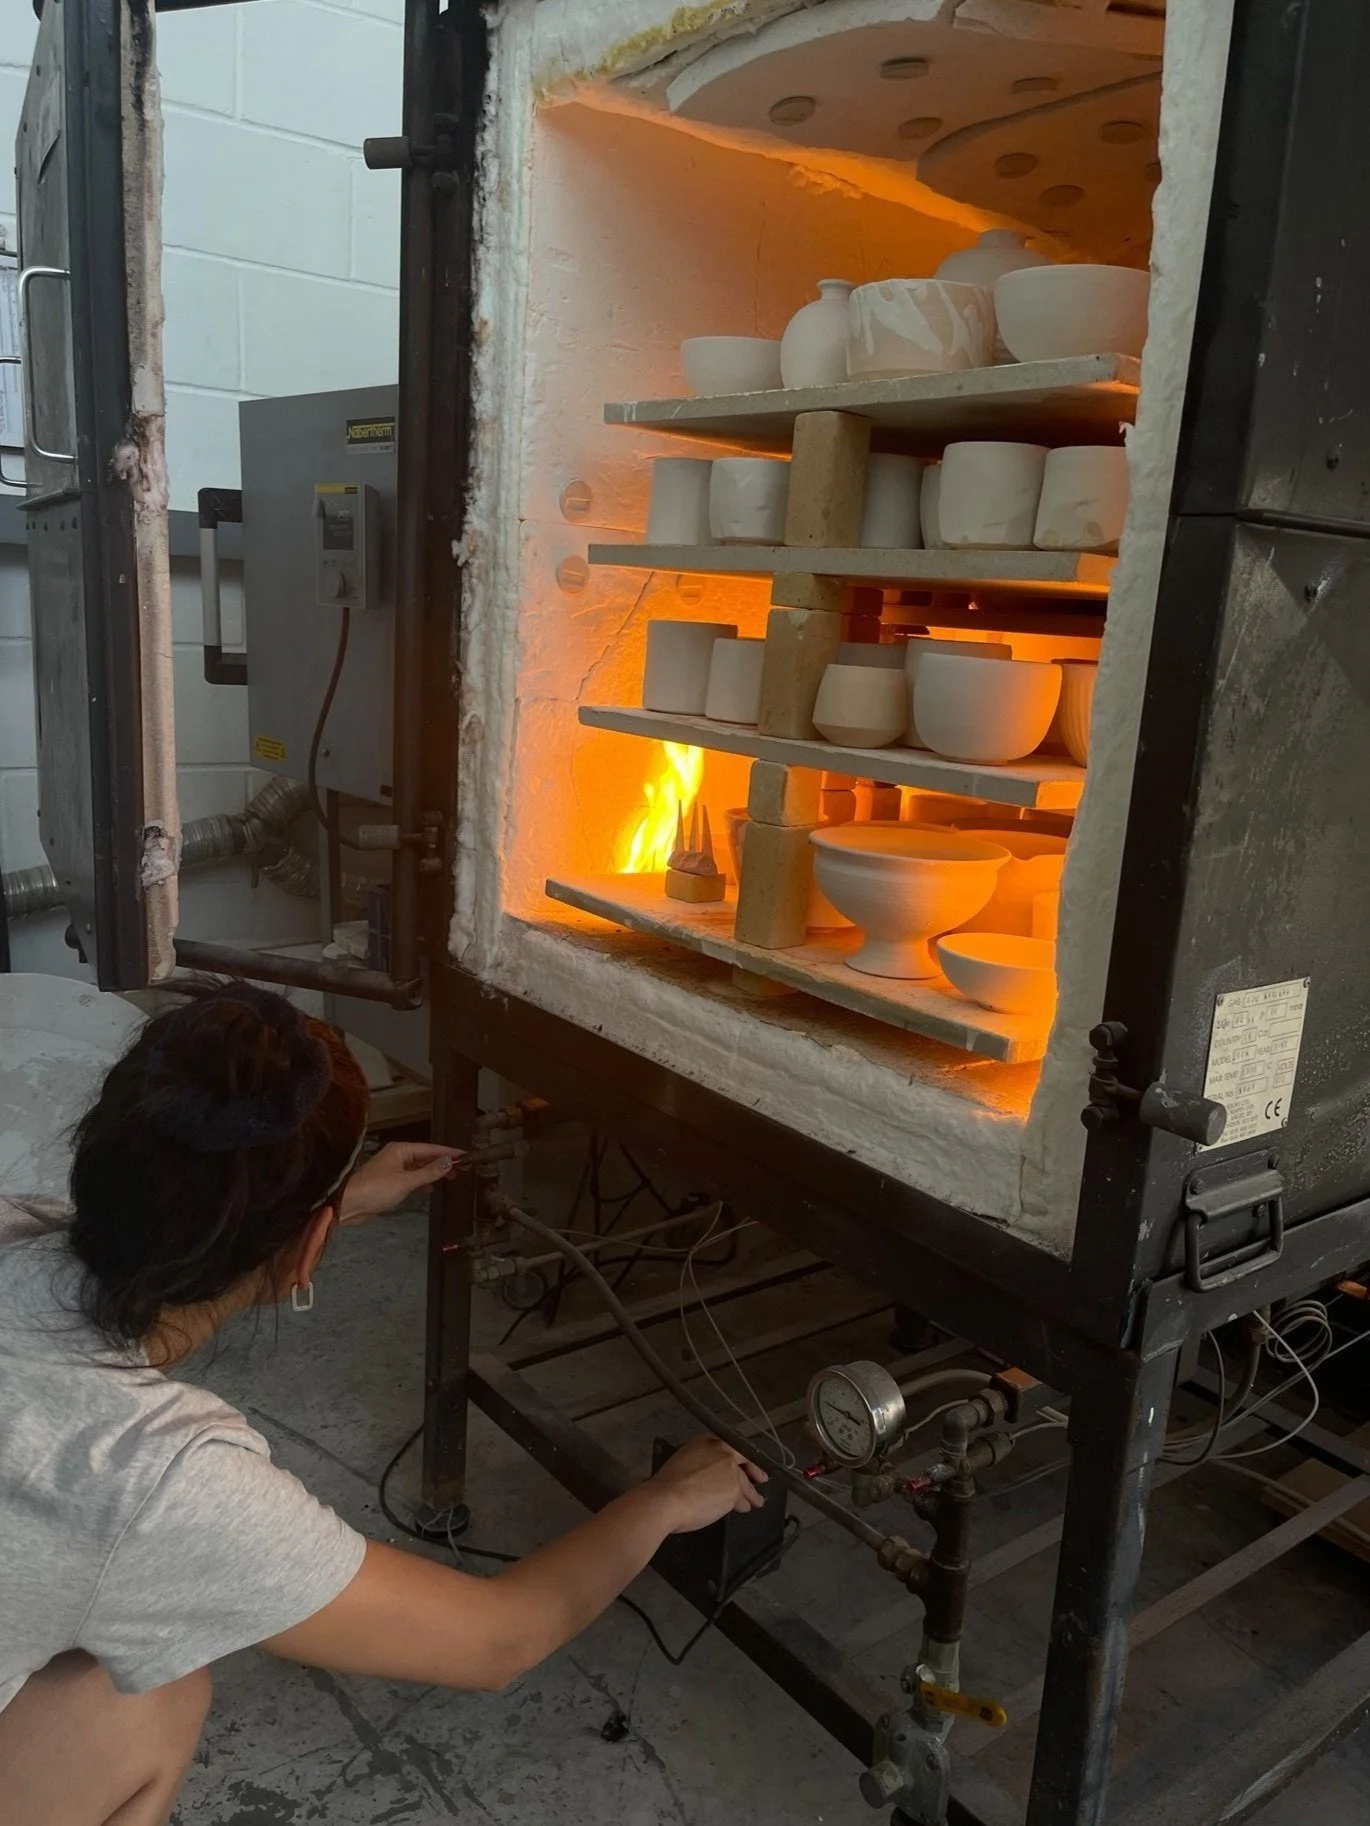
Starting up the kiln - I won’t go into details of the ignition process as it’s basically the same as lighting a gas stove. We kept the door open when starting up the flame to avoid pressure build up. Allow the flame to burn steadily. When closing the kiln door ensure that it is completely sealed. This will prevent heat loss.
Nat summoning the flame God
All four ports are lit! Cone packs in positioned
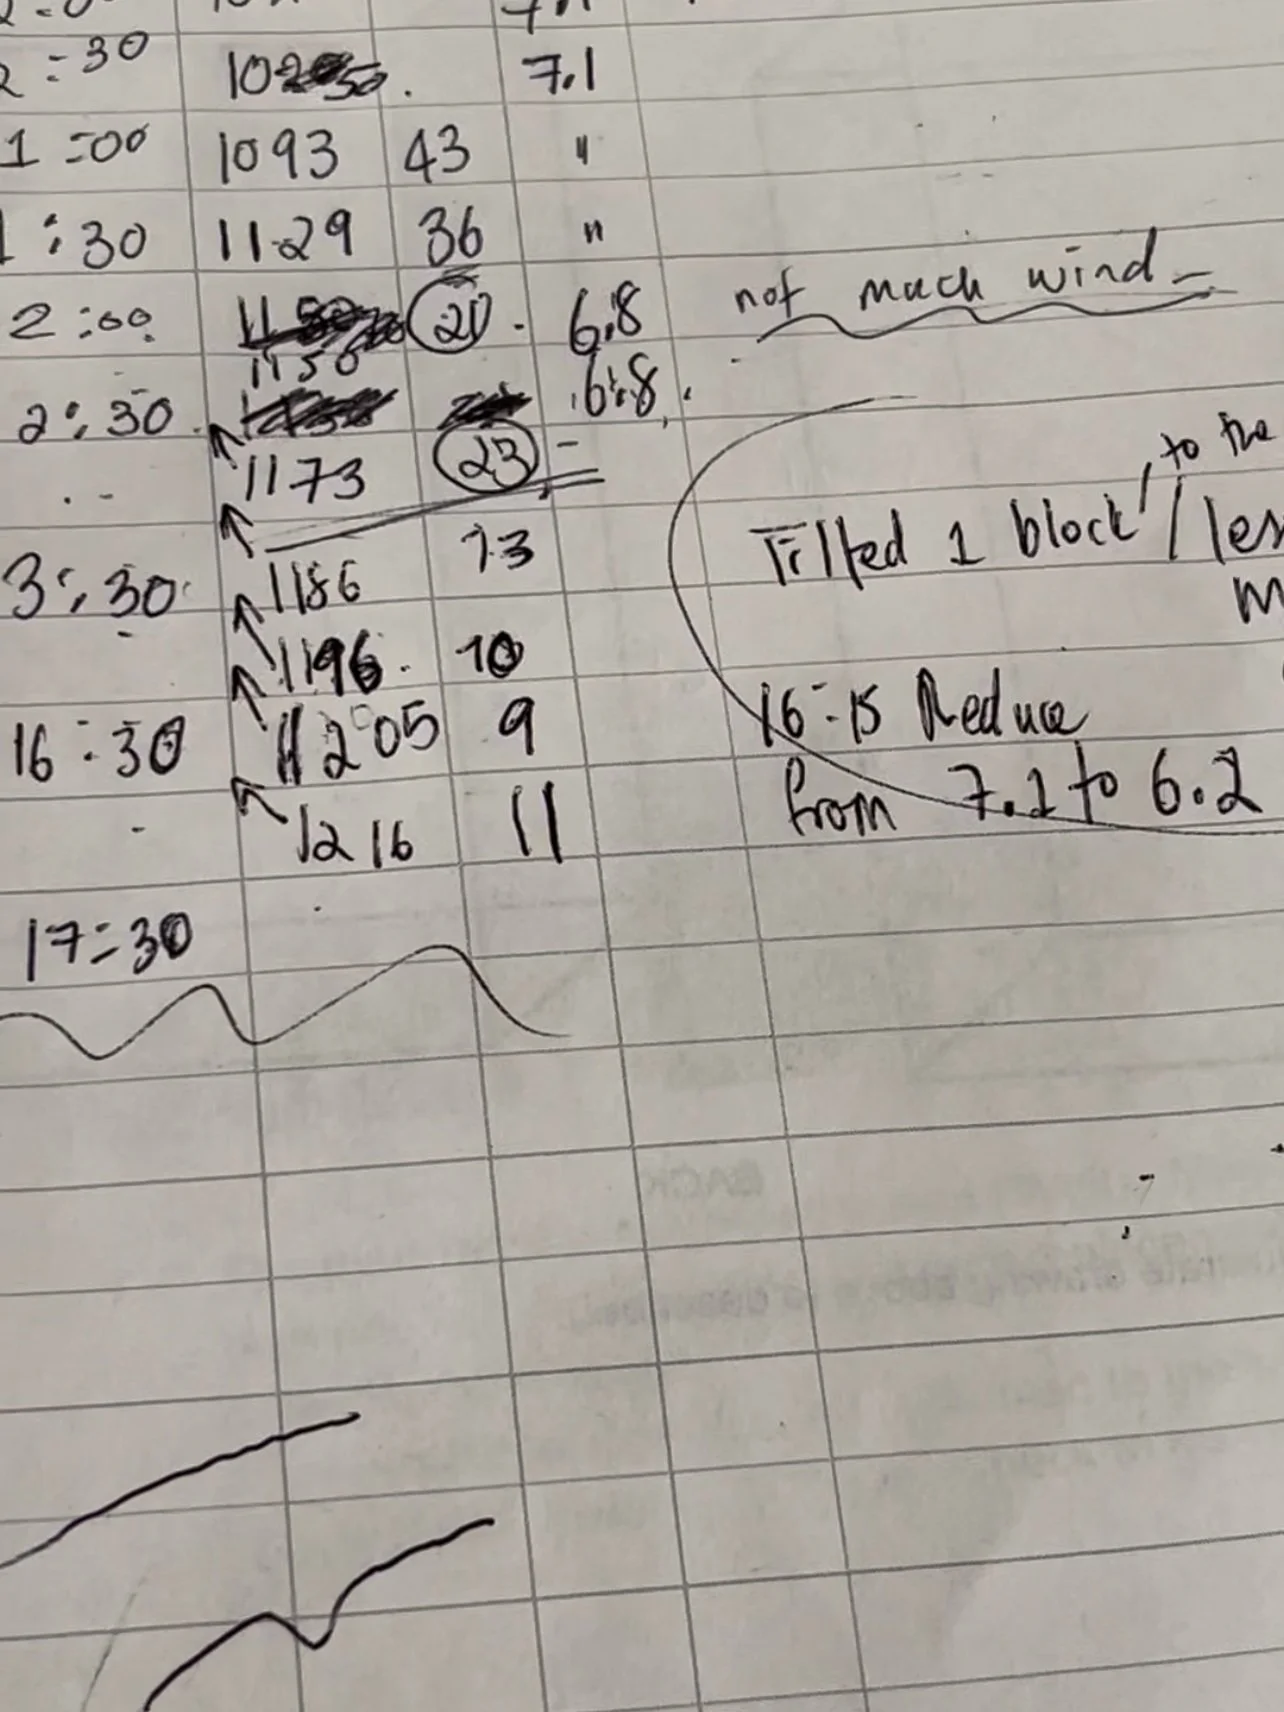
Firing log
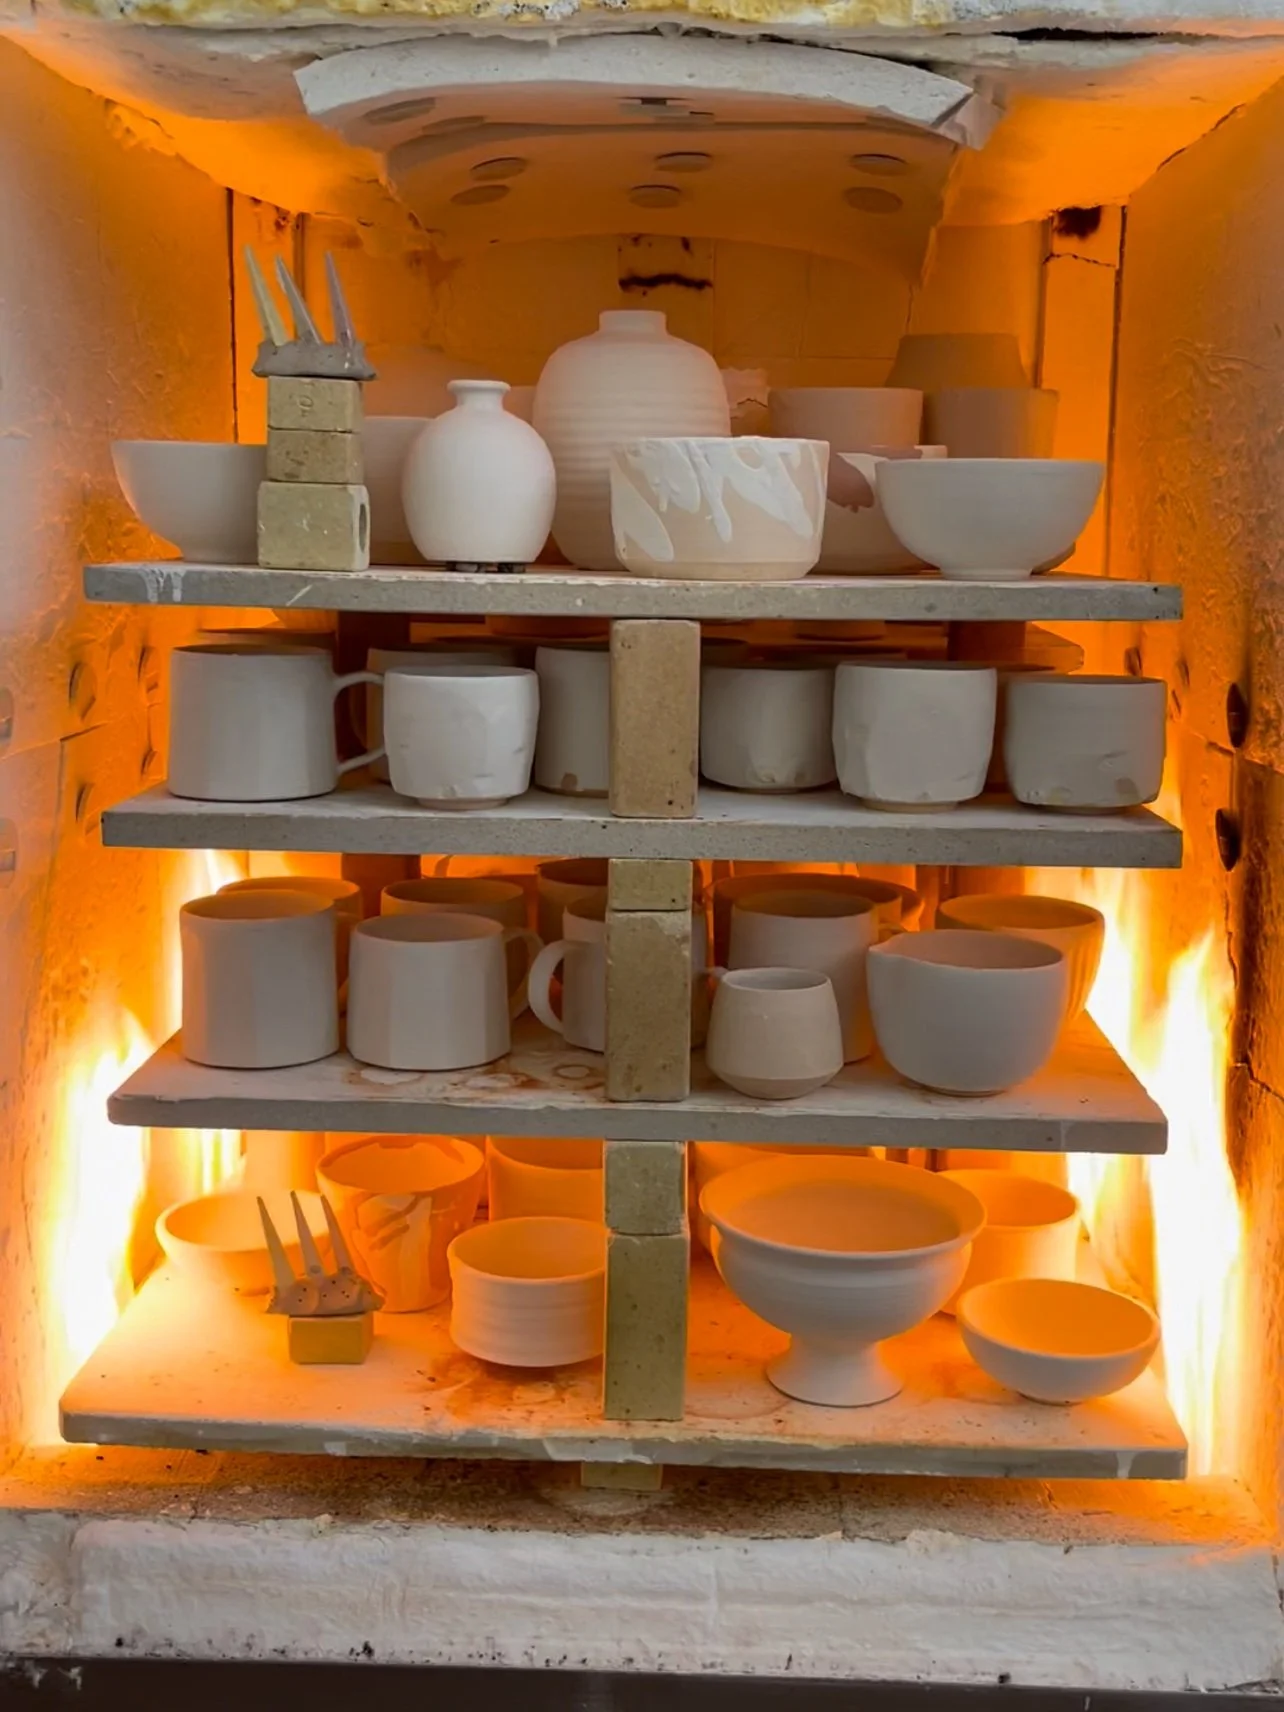
We started recording the temperature rise as soon as we closed the door. Every 30mins we would come and check the pyrometer and record it in our fire log. The rise to 1000deg was fairly straight forward. The aim is for us to get to the temperature where the glaze fully matures but also to maintain the kiln in a reduction atmosphere. At around 1150 deg mark, we observed the temperature stalling so we tweaked the fuel intake/pressure. Make sure to allow 30mins for each alteration you make whether decreasing or increasing the fuel to closing the air vent with bricks to settle in before you make another change.
The last 100-150 deg climb was slow….worrying at some point, we stopped looking at the pyrometer… There are many factors why the temp may stall, we thought the kiln was abit tightly pack that day and also we didn’t have much wind..We lowered the gas pressure as you can see from the fire log from 7.1 to 6.8 and removed one brick from the air vent. We saw the temperature rising up again. If you remove a block you’re putting the kiln back into oxidation mode again but as I mentioned before its a trade off to ensure we reach cone 09 temperature. Look out for the sign that the kiln is still undergoing reduction, remove the covers on the peep hole and see if there is streak of orange flame the longer the flame is the more reduction. We observed that from the top peep hole there was more reduction taking place all the way till the end.
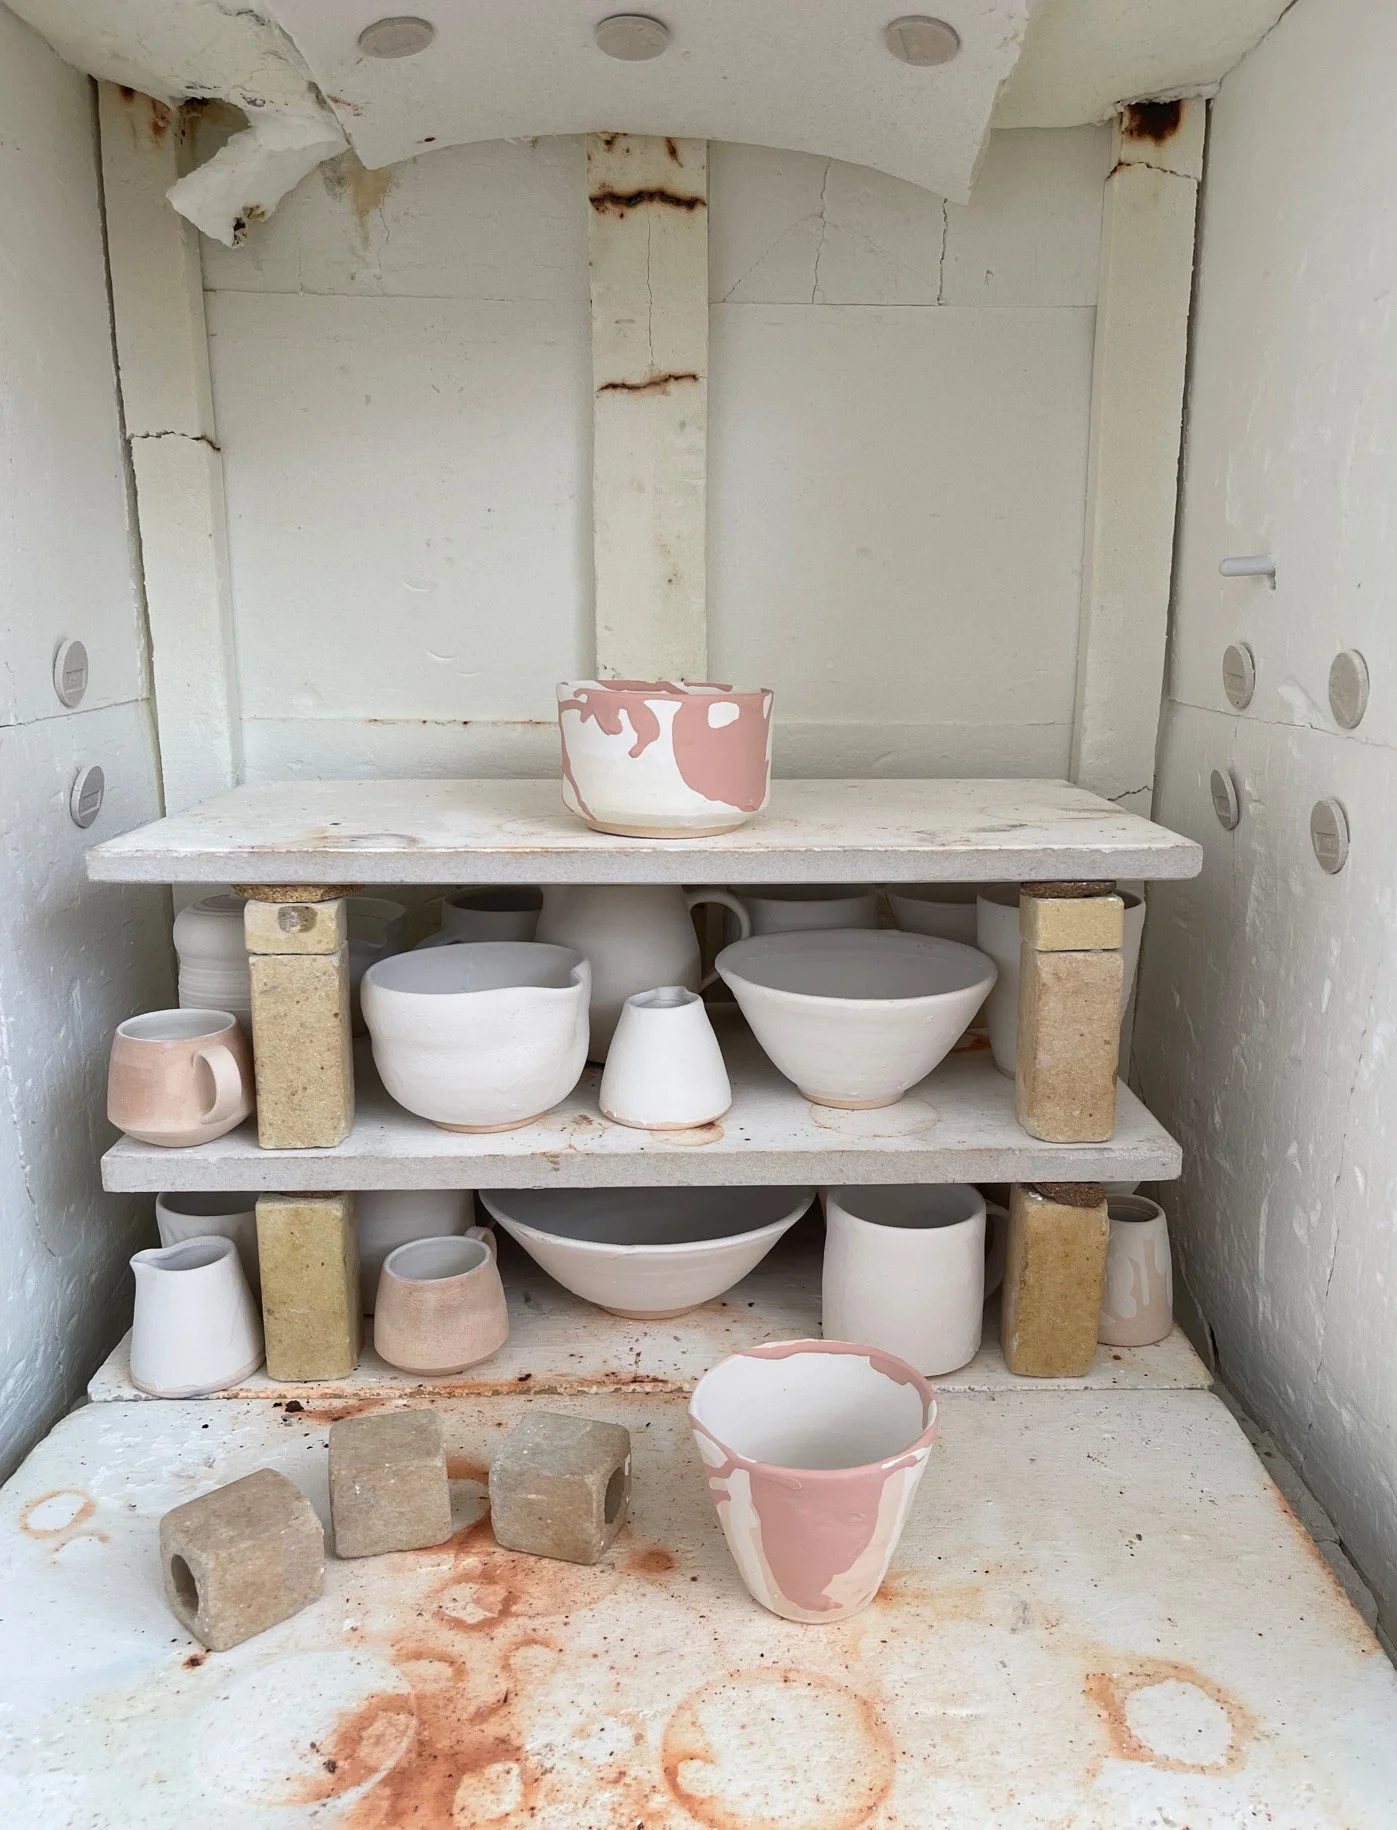
Results/ overall experience: I really enjoyed the whole firing process!! Regardless of the intense heat that day I’m excited to try it out again reducing it differently with different clay and glazes. As you can see from the firing results below we achieved are quite diverse! They could be improve a lot more but tis all a valuable lesson learned!
Kiln opening day! The white glaze that doesn’t need much reduction did well at the bottom.
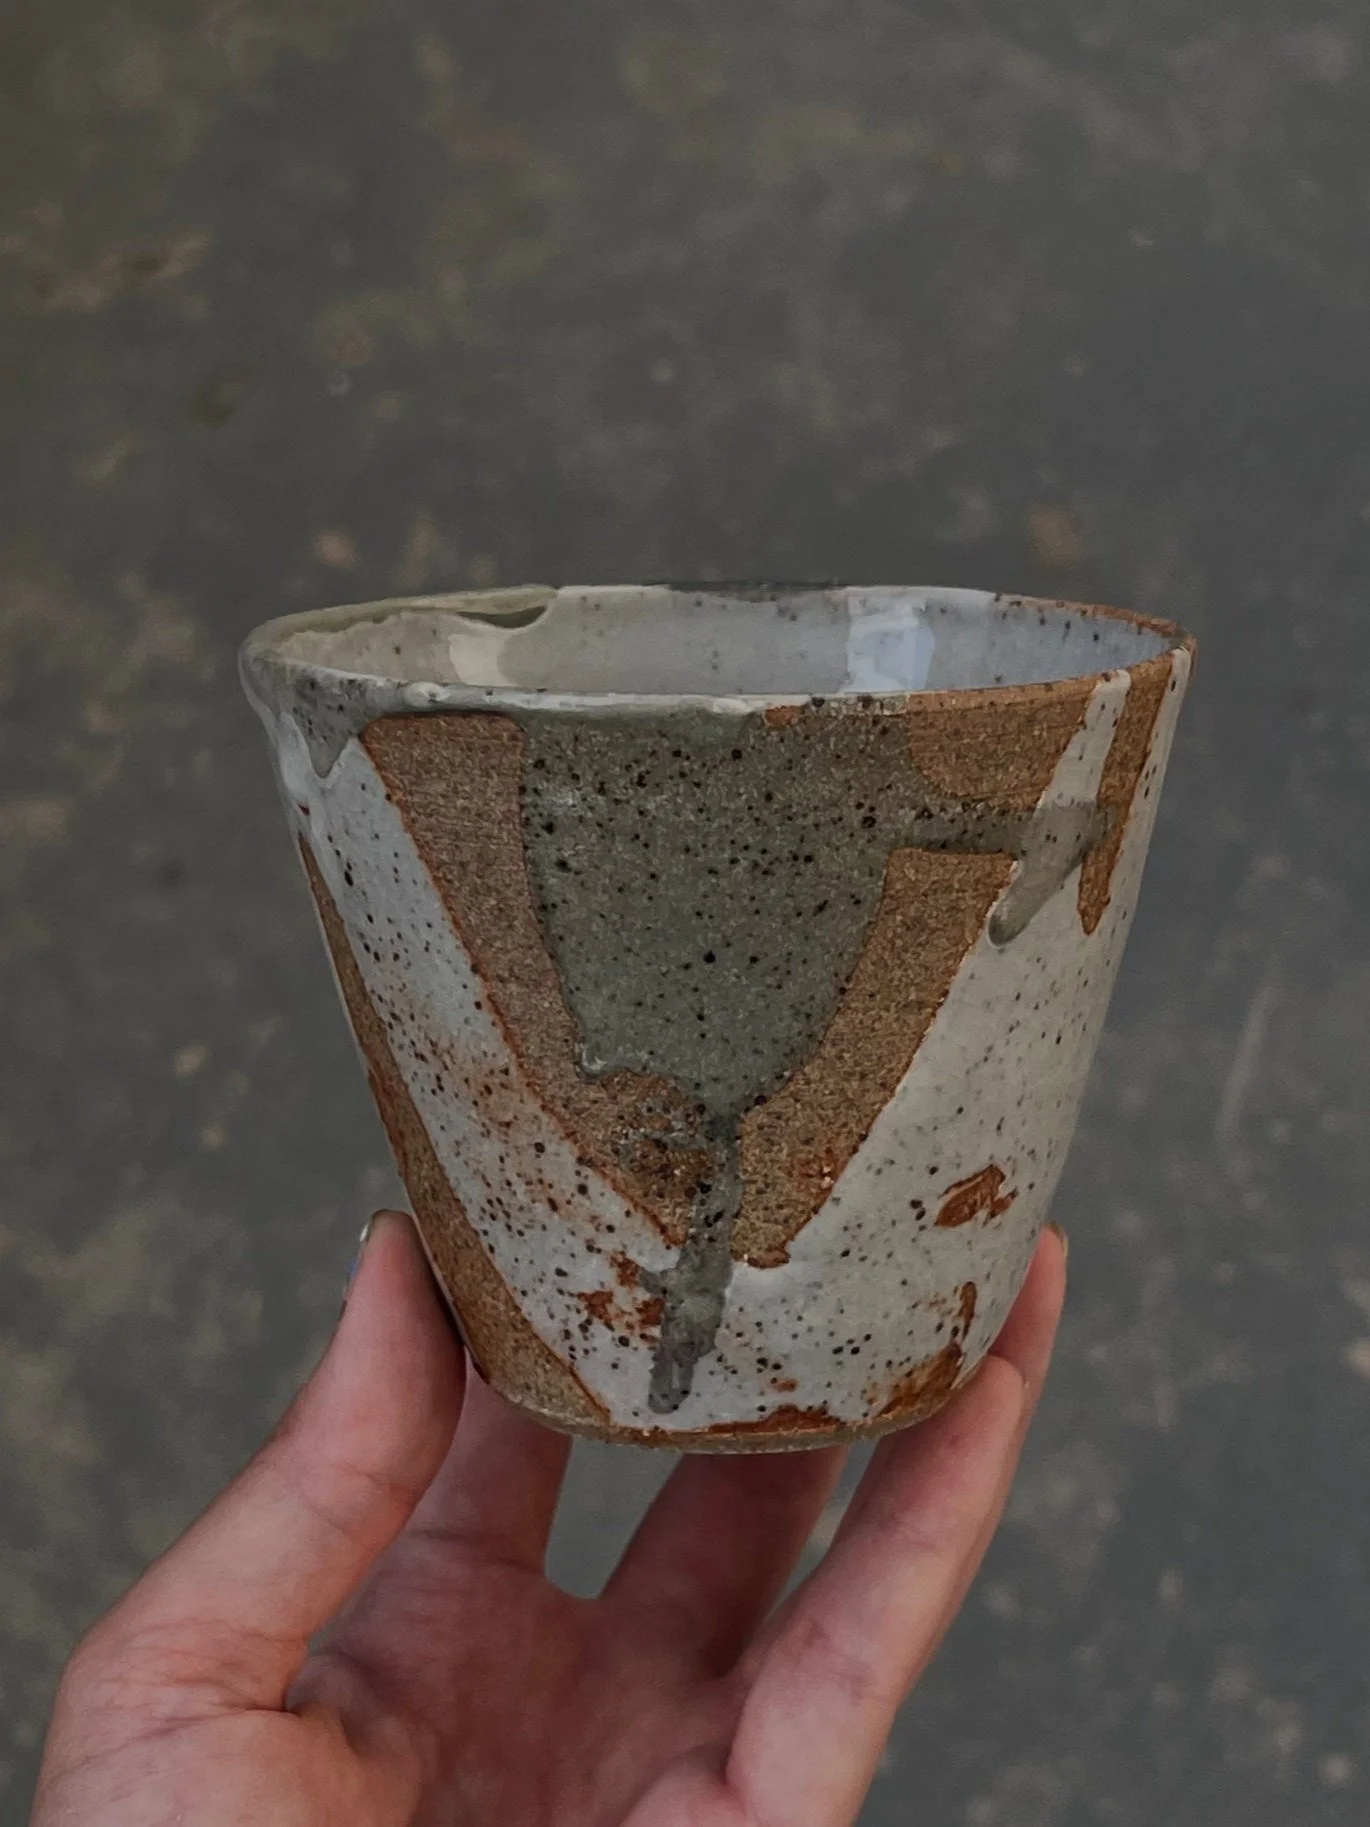
Shino inside Chun splashed outside
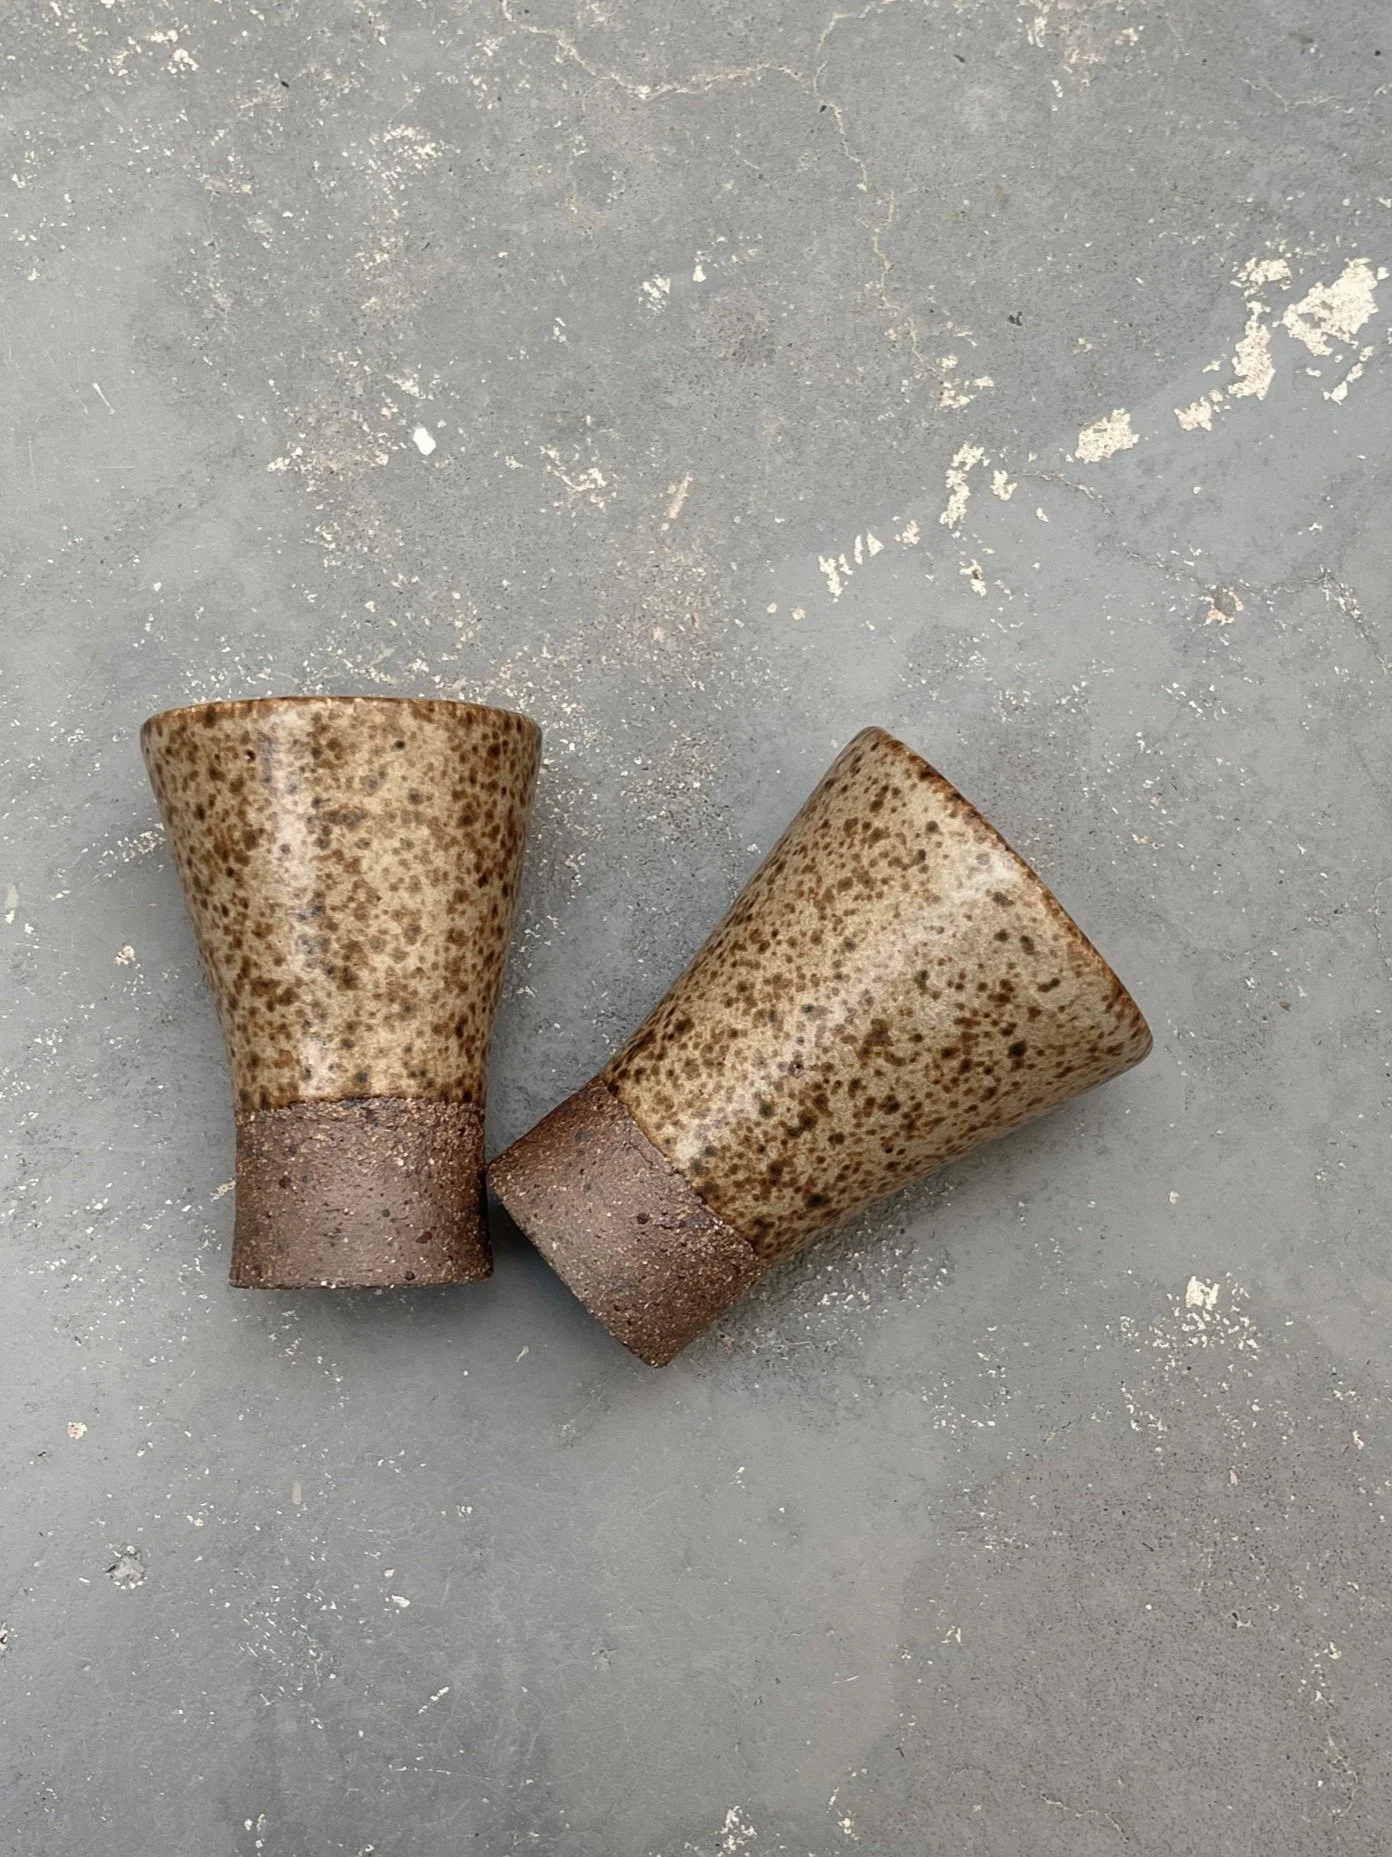
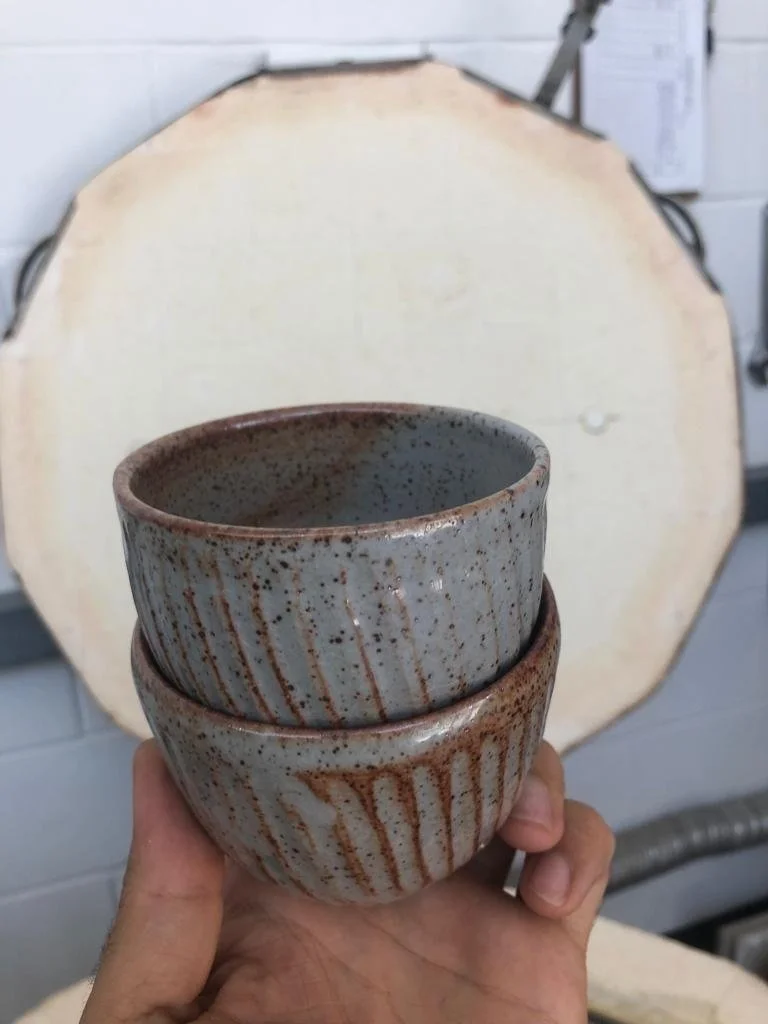
Lavafleck clay - as you can see so much iron coming through (second top shelf positioned)
Dimi’s happy with his cups
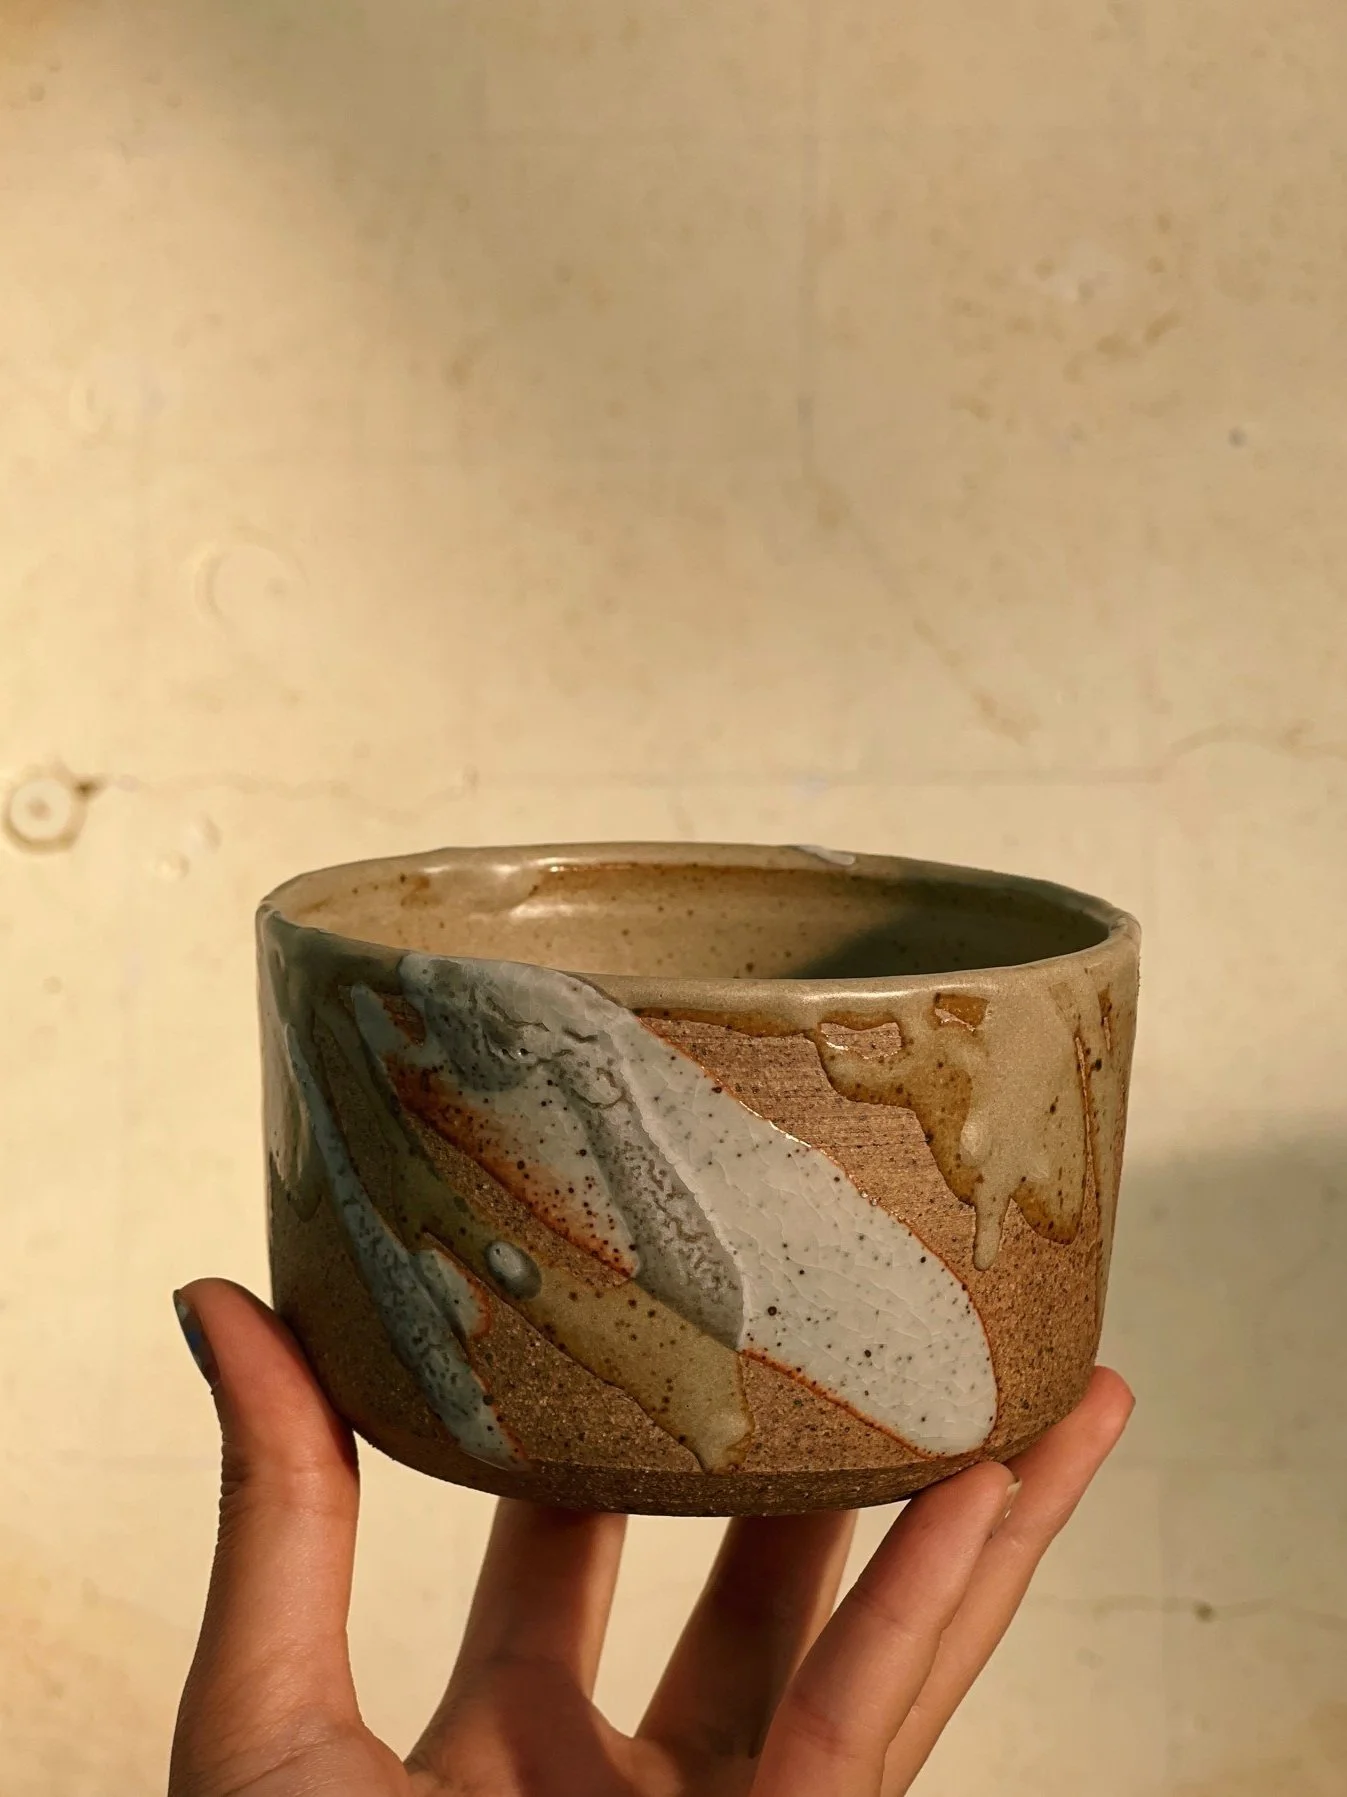
Shino/Chun splashed outside (top shelf position)
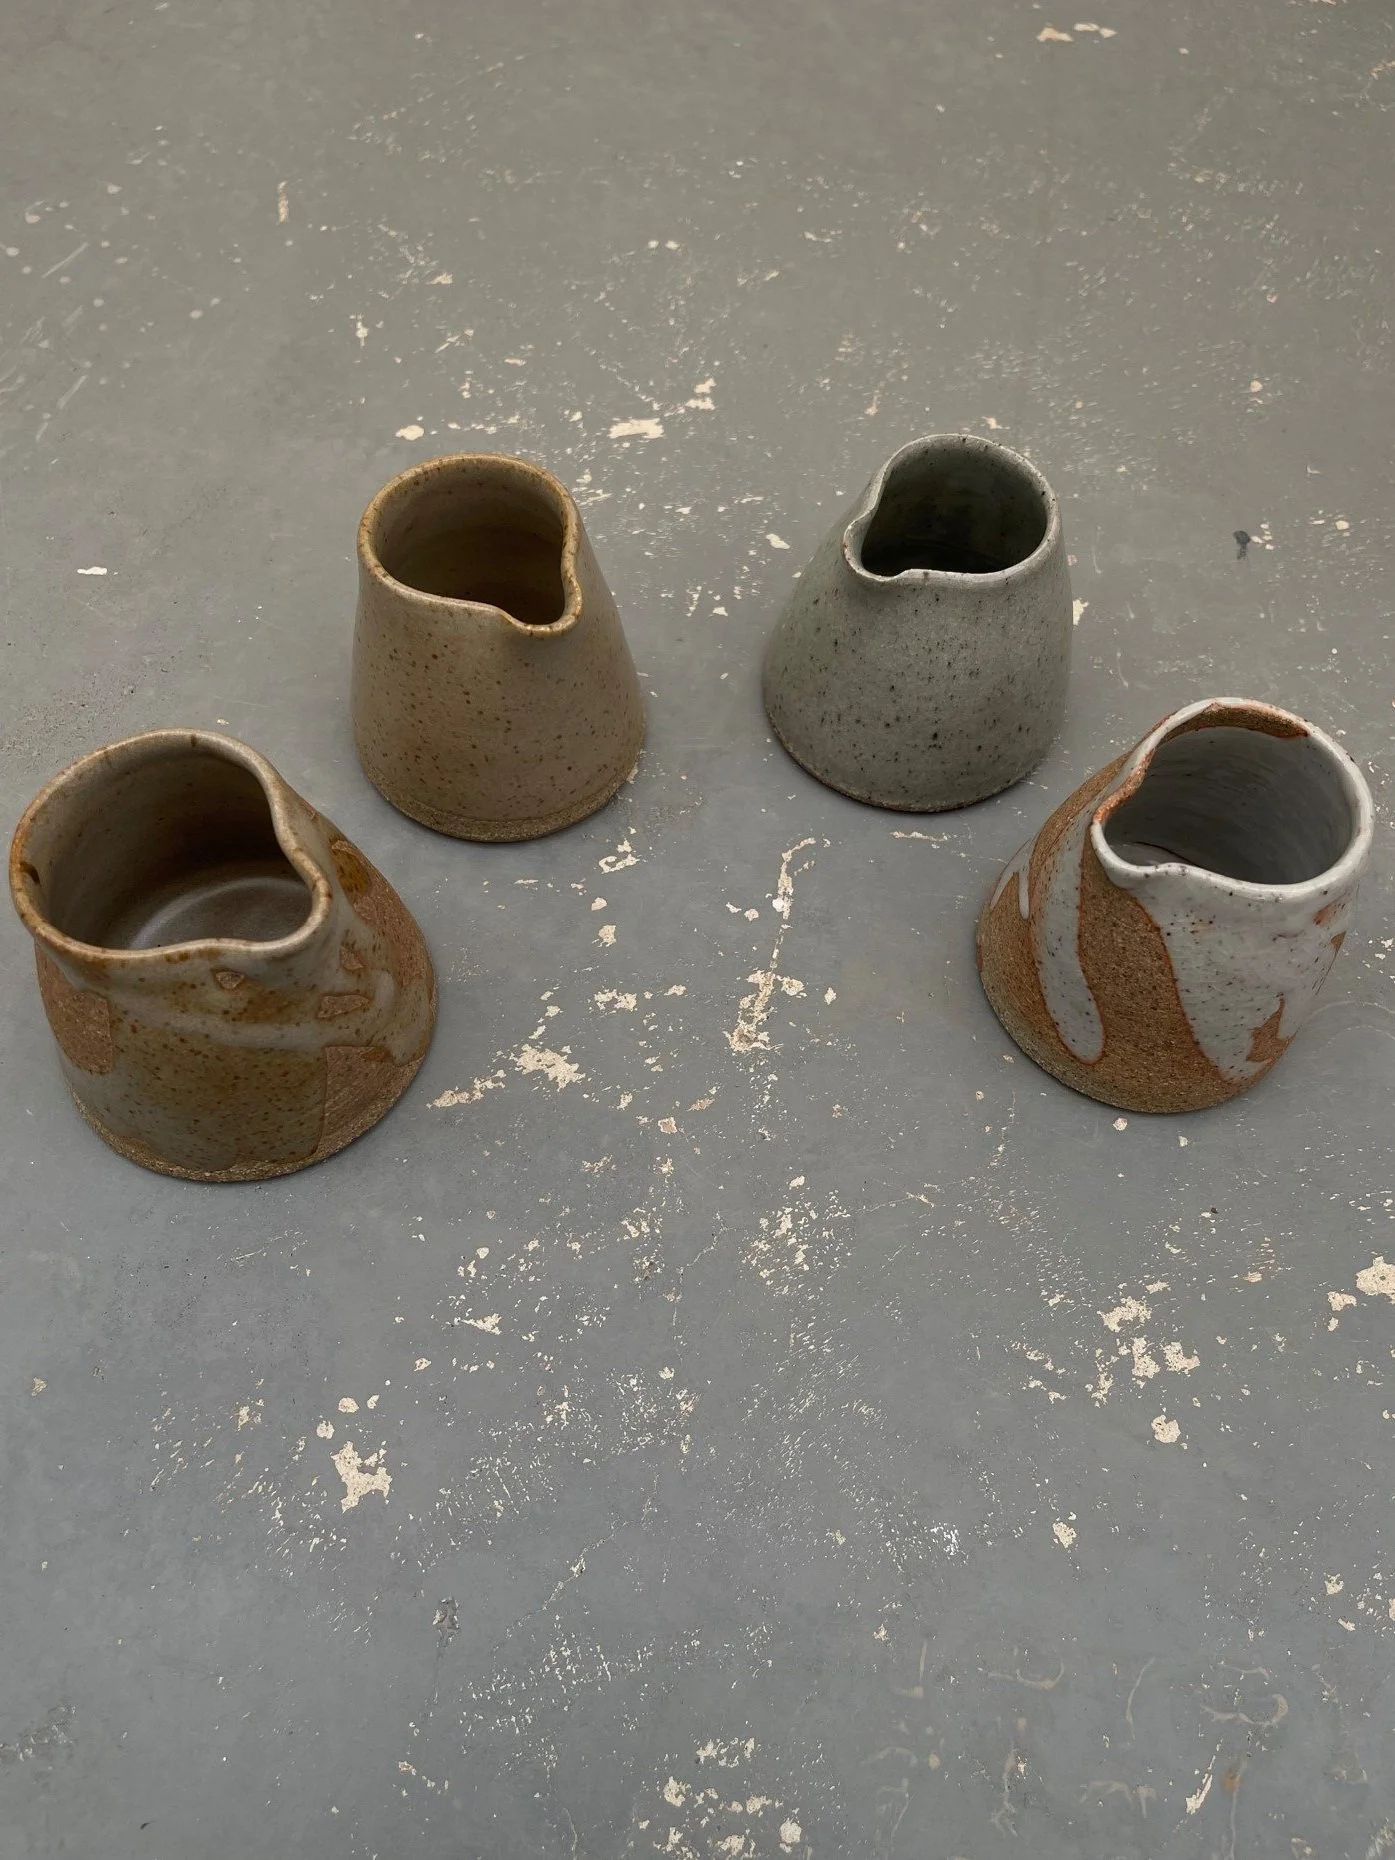
Okkk these are my favsss mini milk jugs. I’ve used 3 different glazes here

Clare’s espresso cups turned out well cute!